Appearance
Azure Blob Storage
Realm Security integrates seamlessly with Azure Blob Storage, enabling intelligent routing and analysis of security event logs. Follow these steps to configure sending logs from your Azure Storage Accounts to Realm Security Data Fabric.
Prerequisites
- Ensure you have administrative access to your Azure console.
Overview
- Azure Console: Create Microsoft Entra app registration
- Azure Console: Create Event Hub
- Azure Console: Create Storage Account and Container
- Azure Console: Configure Event Hub Notifications
- Realm Console: Configure Azure Blob Storage Input Feed
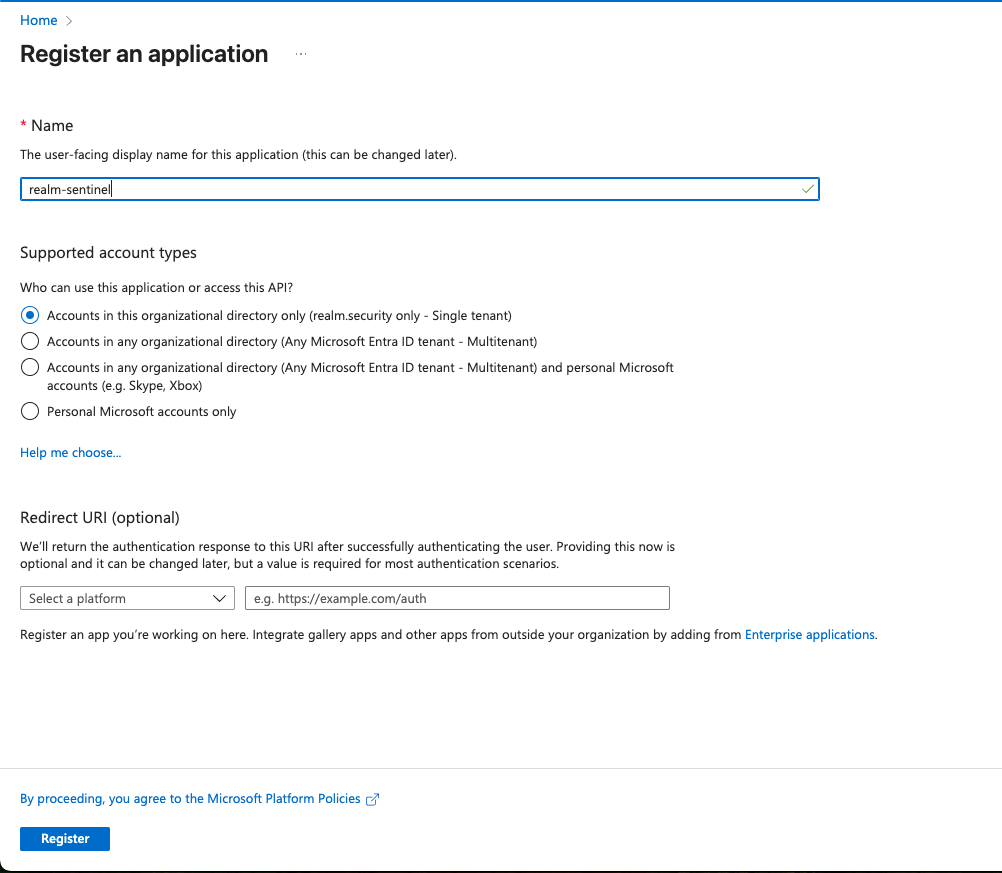
1. Azure: Create Microsoft Entra App Registration
- Log in to the Azure console.
- Navigate to App Registrations > New registration.
- Give the app a name and click Register.
- Navigate to the newly created App Registration.
- Store the Client ID and Tenant ID. These will be used later when configuring the Azure Blob Storage input feed in the Realm console.
- Navigate to Manage > Certificate and secrets. Select the Client secrets tab and click New client secret.
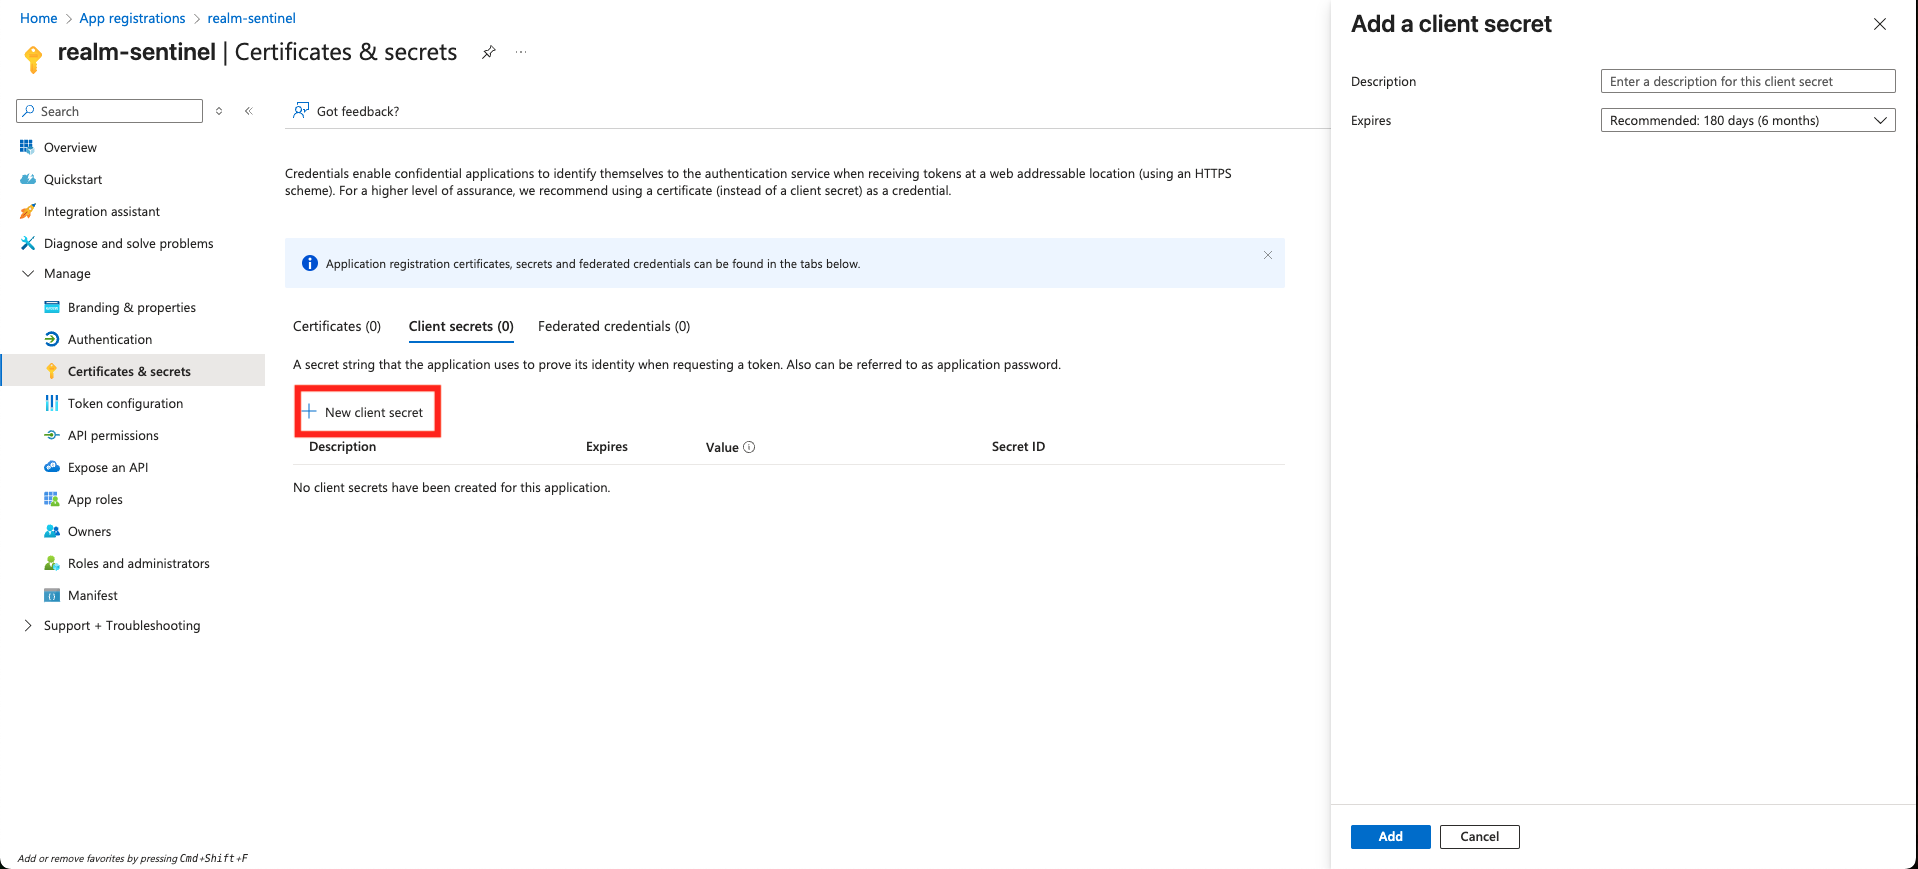
- Give the secret an optional description and select an expiration.
- Store the client secret value — it will be used later when configuring the Azure Blob Storage input feed in the Realm console.
2. Azure: Create Event Hub
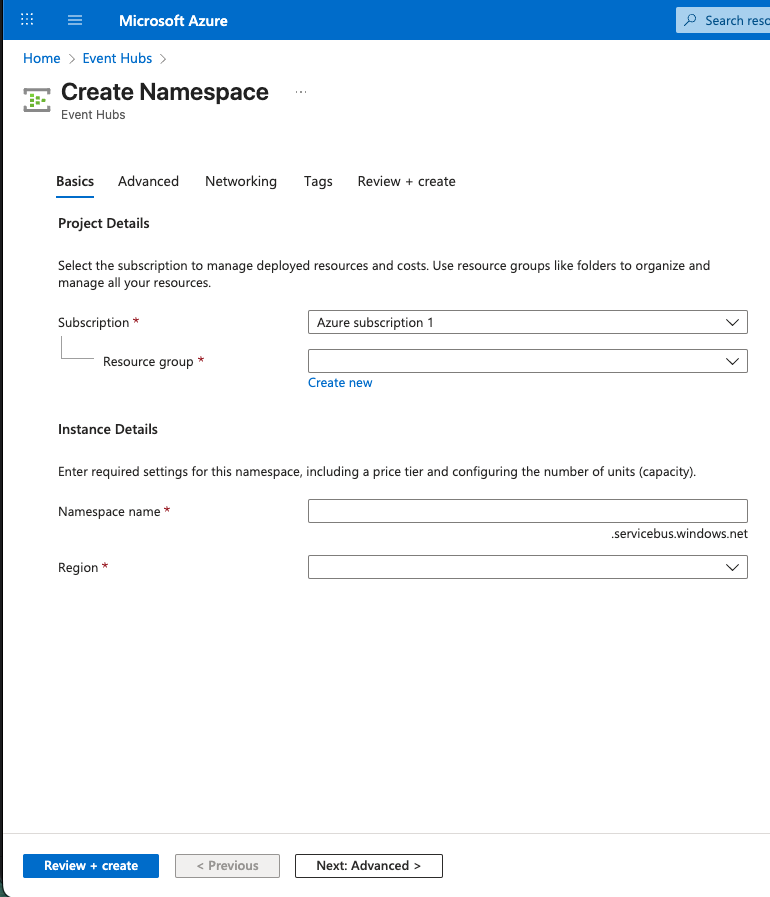
Navigate to the Event Hubs page in the Azure portal.
Select + Create and fill out the Basics tab:
Subscription/Resource Group: Select your existing group Namespace name: Give the namespace a globally unique name Region: Select the same region as your logs Pricing tier: Select any tier except Basic (Basic does not support Event Grid notifications)
Store the fully qualified namespace name (e.g.,
your-namespace-name.servicebus.windows.net) and the Event Hub name — these will be used when configuring the input feed in the Realm console.
- Select Review + create, then select Create.
- Once deployment is complete, select Go to resource.
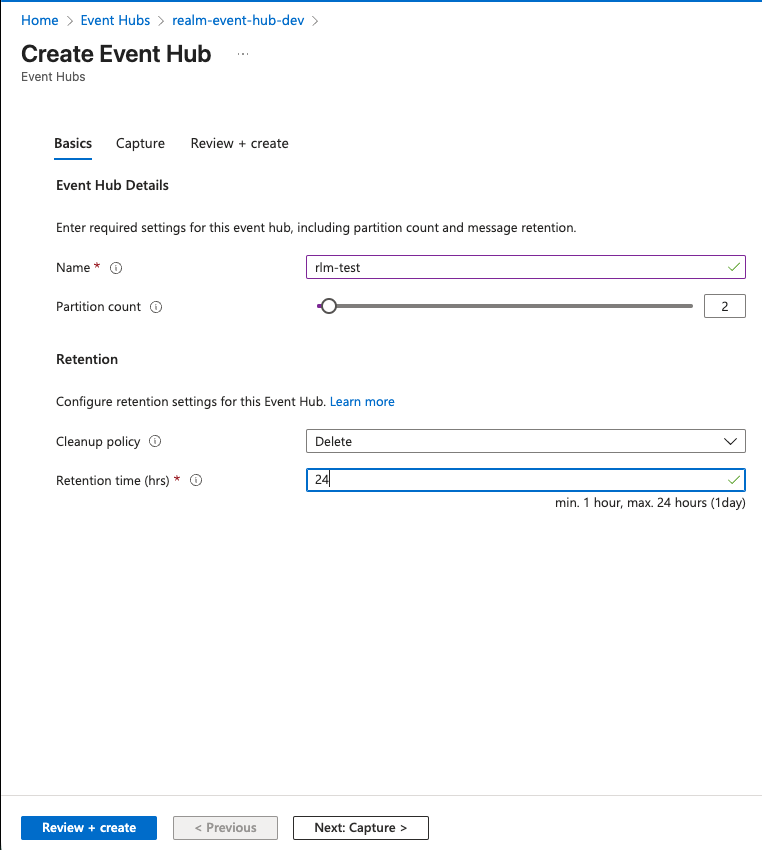
- On the Namespace page, select + Event Hub from the top menu.

Name: Give your Event Hub instance a name Partition Count: 2 partitions is typically sufficient. Refer to Azure Event Hub partitions documentation if you need more. Retention: We recommend at least 8 hours, in case a downstream service has an outage.
Note: If you configure the Event Hub to use a custom consumer group (not
$Default), save that value — it will be used when configuring the input feed in the Realm console.
- Select Review + create, then select Create.
- Select Access Control (IAM) from the left-hand sidebar.
- Click + Add and select Add role assignment.
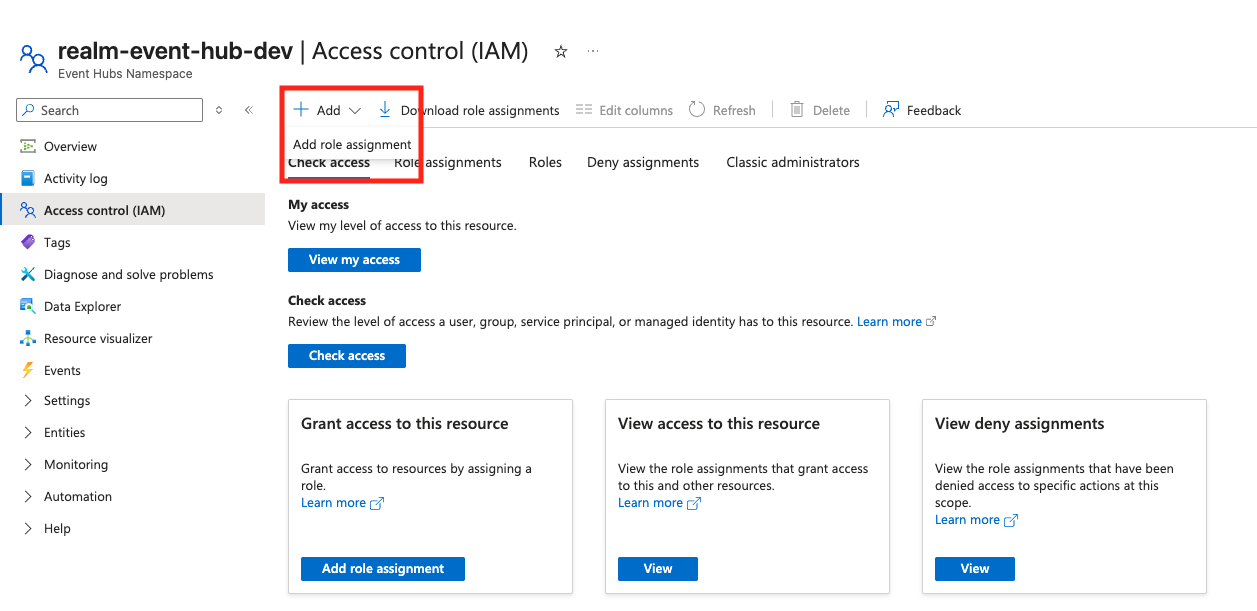
On the Role tab, search for and select Azure Event Hubs Data Receiver.
Note: This role allows the application to read events from the hub and is required for the Realm ingestion process.
On the Members tab:
- Set Assign access to to
User, group, or service principal. - Click + Select members.
- In the search box, enter the Name or Client ID of the App Registration you created in Step 1.
- Select your application from the list and click Select.
- Set Assign access to to
Click Review + assign, then click it again to confirm the assignment.
3. Azure: Create Storage Account and Container
Navigate to Storage accounts and select + Create.
Under the Basics tab:
Storage account name: Enter a unique name Region: Match your Event Hub region Performance: Standard (recommended) Redundancy: Select the level of redundancy you require
Select Review + create, then select Create.
- Store the storage account blob endpoint URL. To find it, navigate to JSON View and copy the value under
primaryEndpoints > blob. Do not include thehttps://prefix.
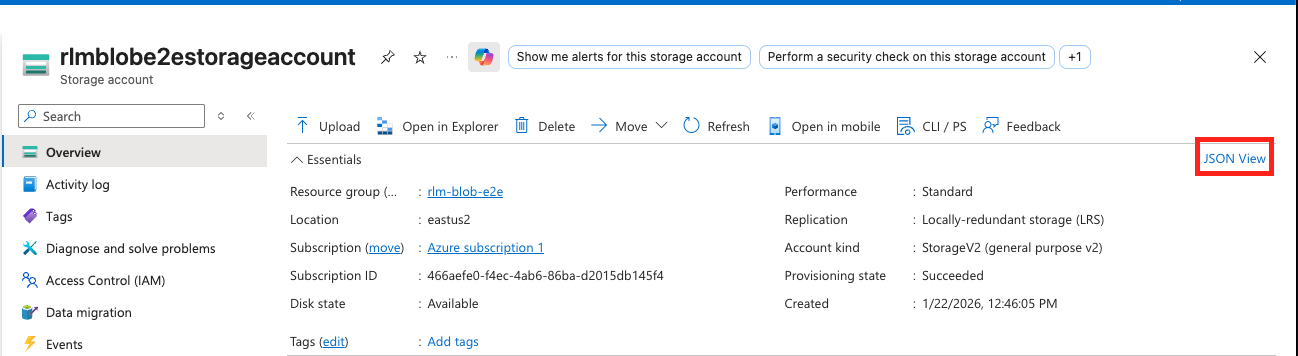
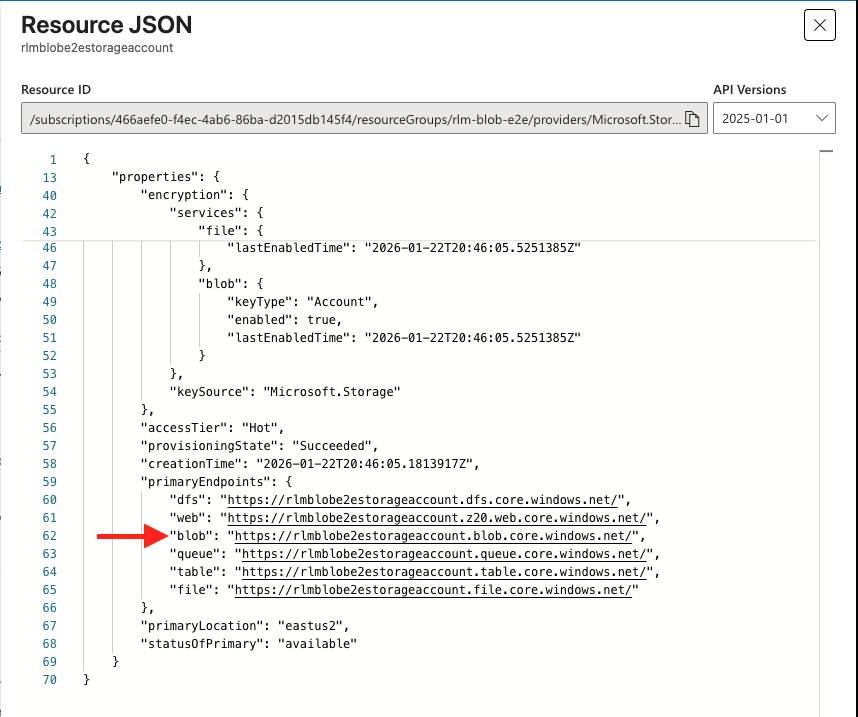
- Store the storage account blob endpoint URL. To find it, navigate to JSON View and copy the value under
Once created, navigate to the storage account and select Data storage > Containers from the left-hand menu.
Select + Container, name it (e.g.,
security-logs), and set the public access level to Private.- Store the container name — it will be used when configuring the input feed in the Realm console.
Select Create.
Select Access Control (IAM) from the left-hand sidebar.
Click + Add and select Add role assignment.
On the Role tab, search for and select Storage Blob Data Contributor.
On the Members tab:
- Set Assign access to to
User, group, or service principal. - Click + Select members.
- Search for the Name or Client ID of the App Registration created in Step 1.
- Set Assign access to to
Select your application and click Select.
Click Review + assign, then click it again to confirm.
4. Azure: Configure Event Hub Notifications
- Navigate to your Storage Account page.
- On the left sidebar, select Events.
- Select + Event Subscription at the top.
- Fill out the Basic tab:
Name: Give the subscription a name Event Schema:
Event Grid SchemaSystem Topic Name: Provide a name Filter to Event Types: Uncheck all and select onlyBlob Created - Under Endpoint Details:
Endpoint Type:
Event Hubs- Click Select an endpoint and choose your Subscription, Namespace, and the Event Hub created in Step 2.
- Click Confirm Selection.
- Select the Filters tab to provide a Subject Begins With filter (e.g.,
/blobServices/default/containers/security-logs/) if you only want to send logs from a specific container. - Select Create. Azure will now automatically send a notification to the Event Hub every time a new log file is uploaded to the container.
5. Realm Console: Configure Azure Blob Storage Input Feed
- Select the source you want to connect with the Azure Blob Storage Input Feed and click the + button above the input feeds for the source.
- Assign a name and description to the input feed, then select Azure Blob Storage as the method.
- Fill out the form:
Storage account: The blob endpoint URL stored in Step 3 Container name: The name of your storage container from Step 3 Event Hub Namespace URL: The fully qualified namespace (e.g.,
your-namespace-name.servicebus.windows.net) from Step 2 Event Hub Name: The name of the Event Hub created in Step 2 Tenant ID: Tenant ID of your App Registration from Step 1 Client ID: Client ID of your App Registration from Step 1 Client Secret: Client Secret of your App Registration from Step 1 - Click + Add.