Appearance
Ingesting logs from Sumo Logic
Realm supports ingesting logs from Sumo Logic. While this is not a typical setup our customers leverage in Production, it is useful during POCs.
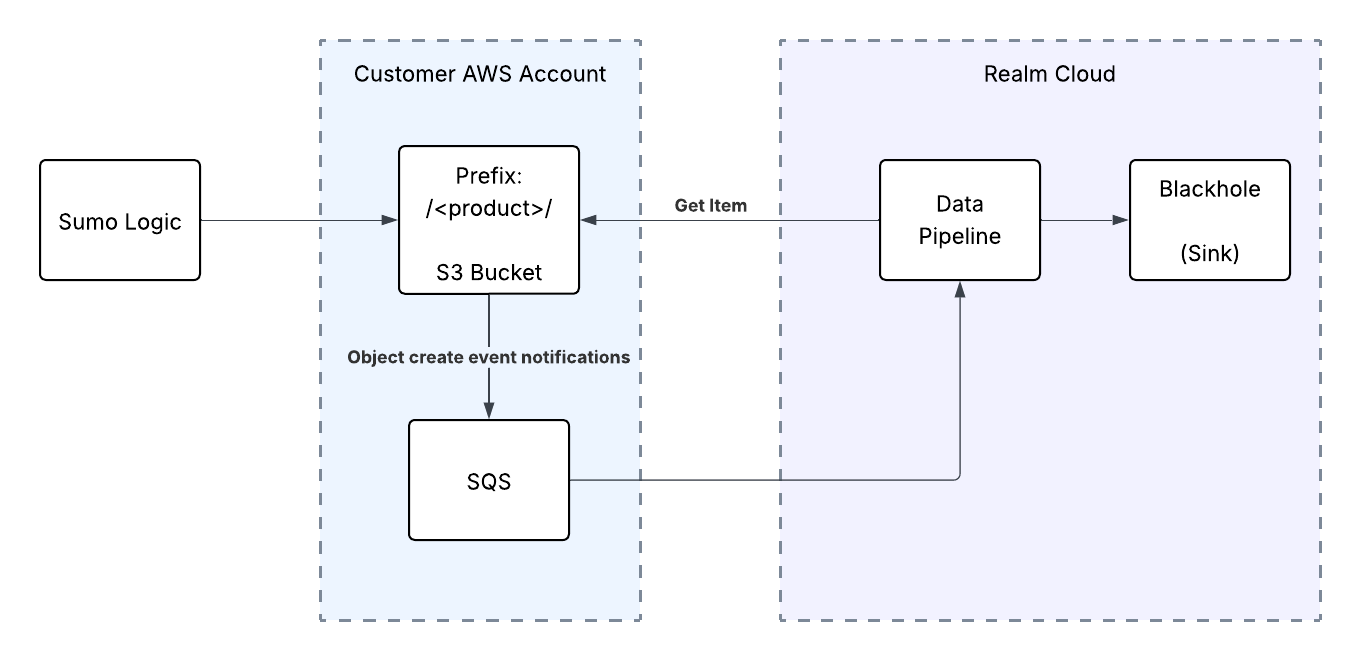
The integration involves the following steps:
- Step 1: AWS Console: Create S3 Bucket & Role for Sumo Logic
- Step 2: Sumo Logic: Setup Data Forwarding in Sumo Logic
- Step 3: AWS Console: Setup Bucket Notifications & SQS Queue
- Step 4: Realm Console: Setup Source
Step 1: AWS Console: Setup S3 Bucket and Role
In this step, you will set up an S3 bucket and IAM Role for Sumo Logic to forward data to.
Setup S3 Bucket
- Log in to the AWS console.
- Go to S3.
- Click Create bucket and fill out the details.
Setup IAM Policy
Set up an IAM policy that grants read and write permission to the S3 bucket.
- Log in to the AWS console.
- Go to IAM > Policies.
- Click Create Policy.
- Click JSON and paste the following policy, replacing
<bucket_name>with the name of the bucket created above.
json
{
    "Version": "2012-10-17",
    "Statement": [
        {
            "Sid": "AllowS3Writes",
            "Effect": "Allow",
            "Action": [
                "s3:PutObject",
                "s3:GetObject",
                "s3:ListBucket"
            ],
            "Resource": [
                "arn:aws:s3:::<bucket_name>",
                "arn:aws:s3:::<bucket_name>/*"
            ]
        }
    ]
}- Give it a name and click Save policy.
Create IAM Role
Create an IAM role that gives cross-account permission to the Sumo Logic Account ID.
- Go to IAM > Roles.
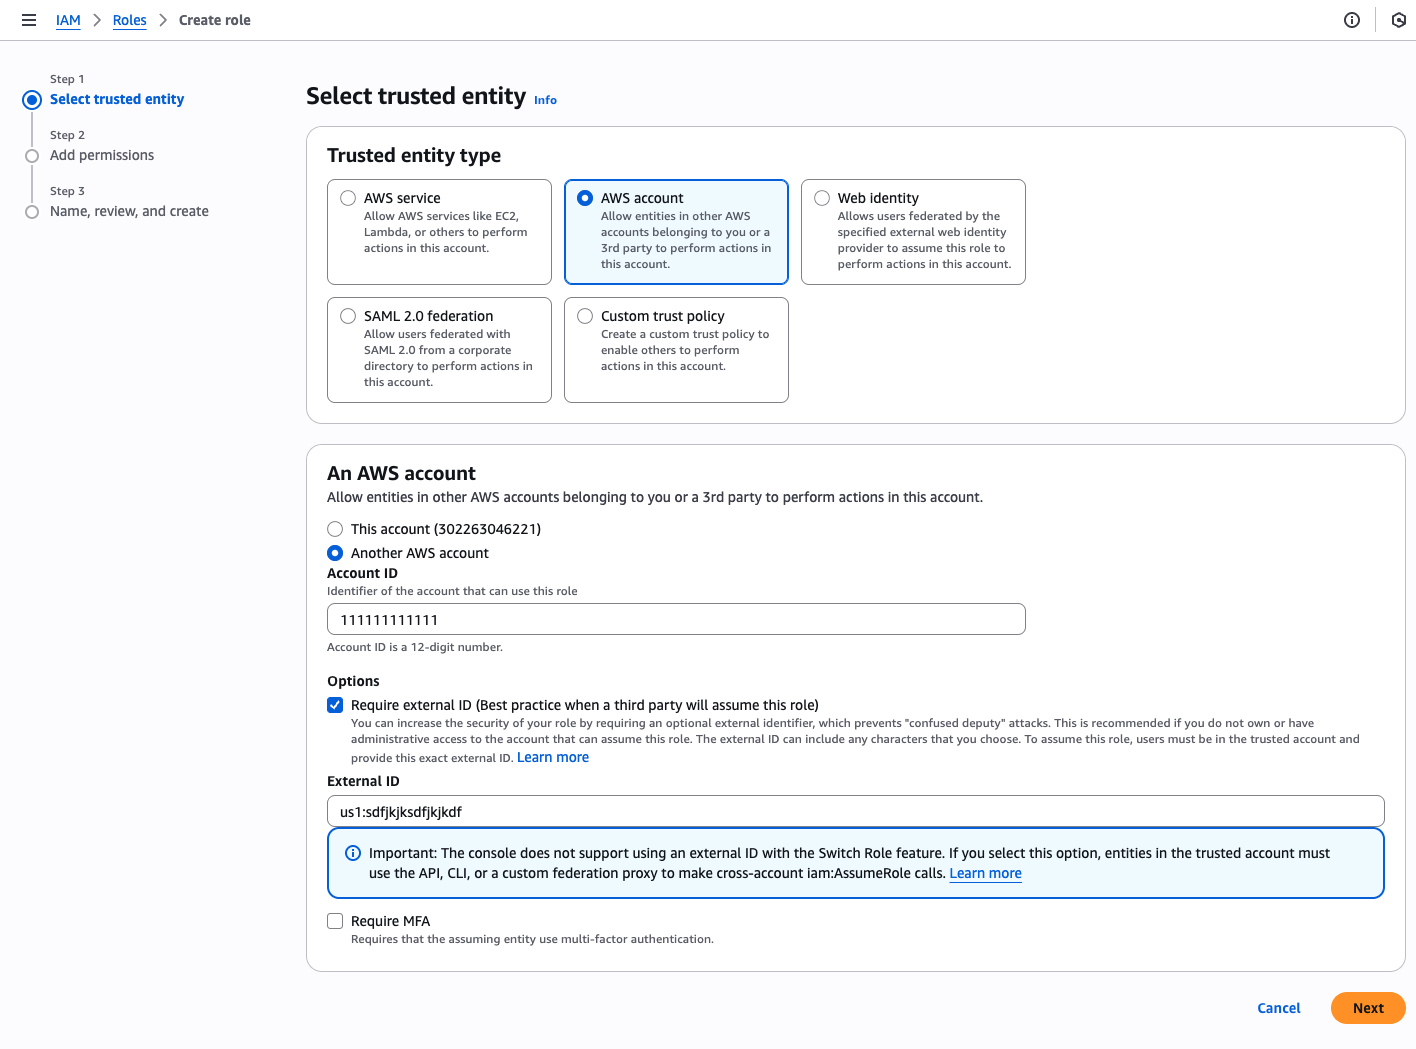
- Click Create Role.
- Select AWS Account.
- Select Another AWS Account and enter the account ID provided by Sumo Logic.
- Select Require External ID and enter the External ID provided by Sumo Logic.
Note: To get the Sumo Logic Account ID and External ID, log in to the Sumo Logic console and go to Data Management > Data Forwarding > Add Destination. Copy the Account ID and External ID from the destination popup.
- Click Next.
- Search for the policy created above and select it.
- Click Next and give the role a name, for example:
sumo-fortigate-s3.
Step 2: Setup Data Forwarding in Sumo Logic
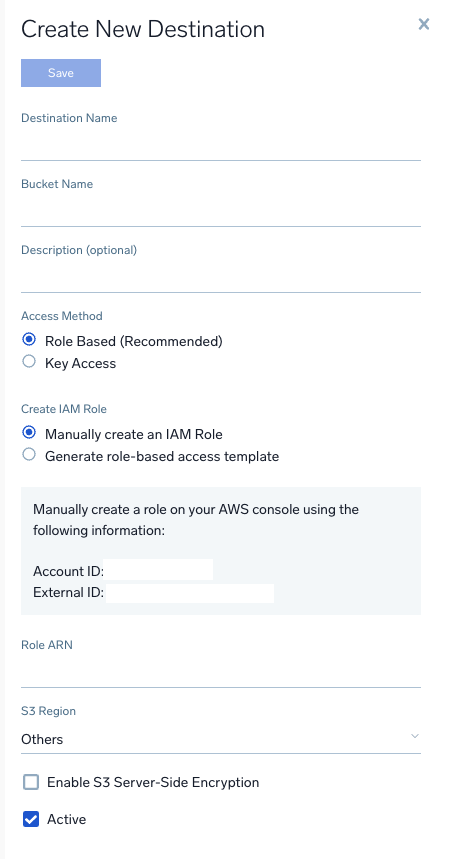
Add Data Forwarding Destination
- In the Sumo Logic console, go to Data Management > Data Forwarding.
- Click Add Destination.
- Enter the name of the S3 bucket created above.
- Enter the region where the S3 bucket was created.
- Enter the ARN of the role created above.
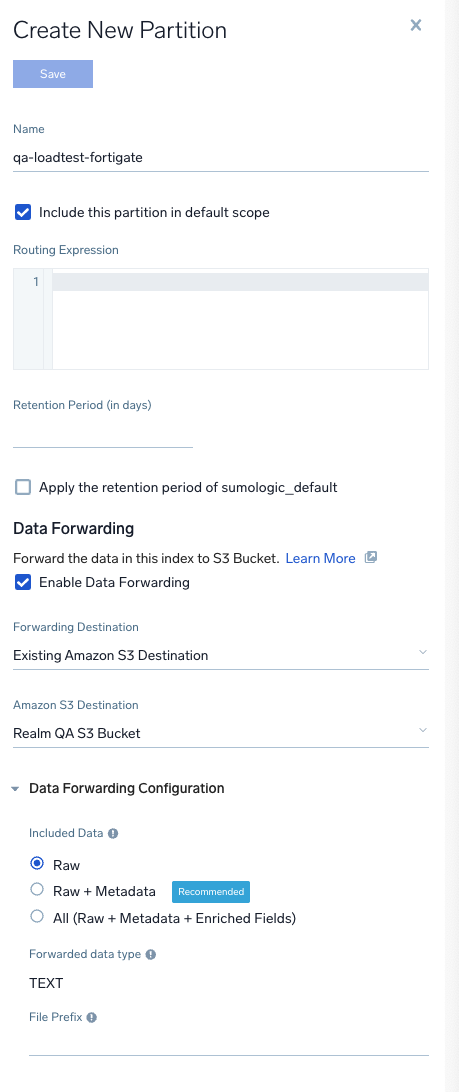
Forward Partition Data to S3 Destination
- In the Sumo Logic console, go to Data Management > Partitions.
- Select the partition you want to configure Data Forwarding for.
- Enable Data Forwarding for the partition and fill in the details:
Forwarding Destination:
Existing Amazon S3 DestinationAmazon S3 Destination: The destination created above Included Data:RawForwarded data type:TEXTFile Prefix:<product_name>/
Note: Make sure the prefix ends with
/— this ensures all logs for the partition are saved to a "product name folder" in S3.
Step 3: AWS Console - Setup Bucket Notifications & Keys
Follow these instructions to set up the SQS queue, bucket notifications, and access keys that will be required in the next step.
Step 4: Realm Console: Setup Source & Destination
Add a Source
- Log in to the Realm console.
- Go to Sources > Add Source.
- Select a product (e.g., FortiGate) and create a new source with a name.
- Select Transport Method:
AWS S3. - Enter the credentials and ARN of the SQS queue.
- Update the name of the input feed to
<source_name>-S3(e.g.,Fortigate - S3). - Click Save.
Add a Destination
- Go to Destinations > Add Destination.
Intended Use:
SIEMName:SIEM - Click Add.
Add Blackhole Output Feed
- On the SIEM Destination page, click Add Output Feed.
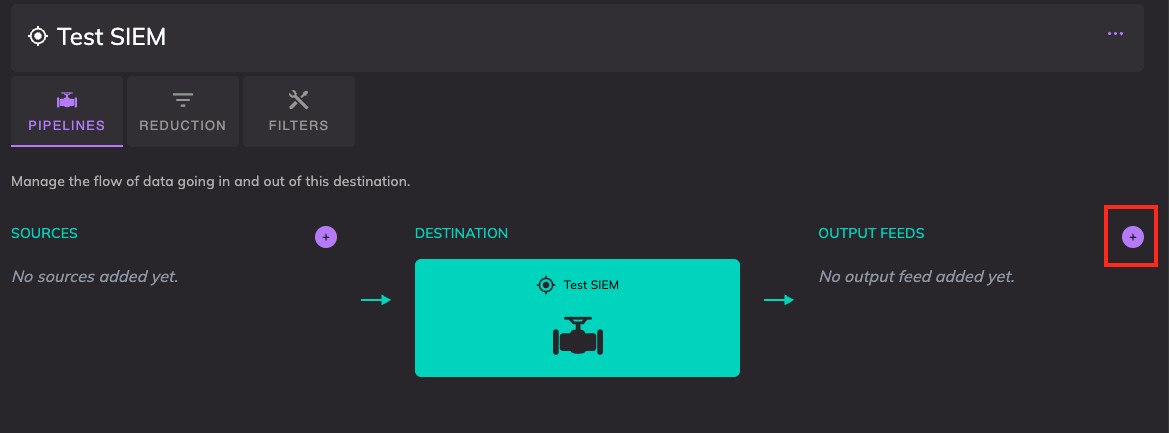
Name:
BlackholeType:Blackhole
- Click Add.
Connect Source to the Destination
- On the SIEM Destination page, click Add Source.
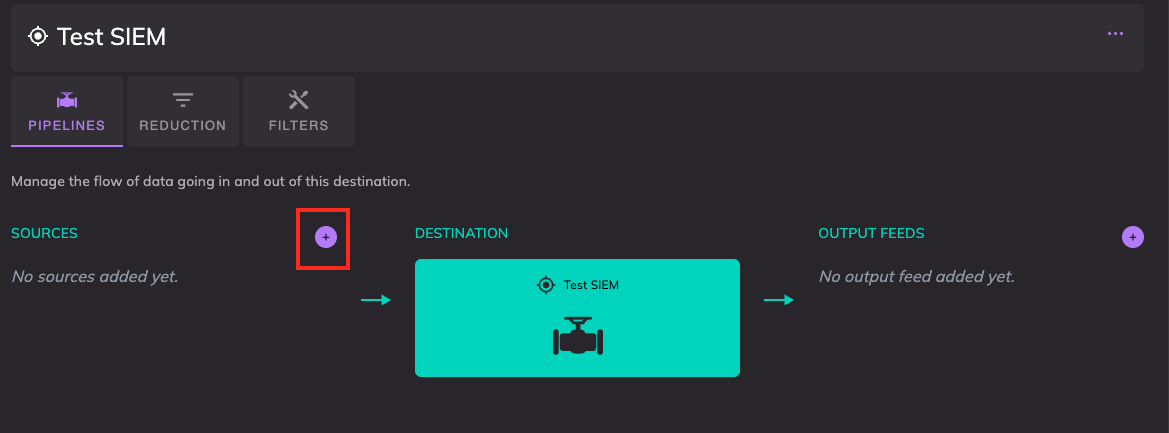
- Select a source from the drop-down (e.g., FortiGate).
- Click Add.