Appearance
Cloudflare Integration
Realm Security can collect log data from an S3 bucket or Azure Blob container, or logs can be sent directly to Realm via an HTTP endpoint logpush.
AWS S3
Use this transport when you are sending Cloudflare WAF logs to an S3 bucket.
Setup AWS
In this step, you will provision the necessary infrastructure in the AWS Console to:
- Create an S3 Bucket to collect Cloudflare logs
- Create an SQS Queue to receive notifications when new logs are written to the S3 bucket
- Update S3 bucket properties to send notifications to the SQS queue
- Create and attach a policy to allow the AWS S3 service to send notifications to the queue
- Create a Realm IAM user with permission to read from the Cloudflare S3 bucket and SQS queue
- Create AWS Access Key and Secret Access Key for the Realm IAM user
Create S3 Bucket
- Go to S3.
- Click Create Bucket and fill out the details.
Name:
rlm-cloudflare-logs - Copy the ARN of the bucket.
Create SQS Queue for Notifications
- Go to SQS.
- Click Create Queue and fill out the details.
Name:
rlm-cf-event-notifications - Copy the ARN of the queue.
Create IAM Policy
- Go to IAM > Policies.
- Click Create Policy.
- Click JSON and paste the following, replacing
<s3_bucket_arn>and<sqs_queue_arn>with the ARNs from above.
json
{
    "Version": "2012-10-17",
    "Statement": [
        {
            "Sid": "s3ReadObjects",
            "Effect": "Allow",
            "Action": [
                "s3:ListBucket",
                "s3:GetObject"
            ],
            "Resource": [
                "<s3_bucket_arn>",
                "<s3_bucket_arn>/*"
            ]
        },
        {
            "Sid": "sqsEventNotifications",
            "Effect": "Allow",
            "Action": [
                "sqs:ReceiveMessage",
                "sqs:DeleteMessage"
            ],
            "Resource": [
                "<sqs_queue_arn>"
            ]
        }
    ]
}- Click Next.
Name:
rlm-s3-notifications-and-readDescription:Grant read access to S3 Cloudflare bucket and receive S3 notifications from the SQS queue - Click Create Policy.
Create User with Credentials
- Go to IAM > Users > Create User.
Name:
rlm-cf-s3-read-user - Click Next.
- Click Attach Policy Directly and select the policy created above.
- Click Next, then Create user.
- Select the user that was just created and copy the ARN — save it for the next step.
- Go to Security Credentials > Create Access Key.
- Select Third party Service, check the confirmation checkbox, and click Next.
Description:
Credentials for Realm.Security to read Cloudflare logs from S3 bucket - Copy and save the Access Key and Secret Access Key — you will need these in the Realm console.
Update SQS Policy
- Go to SQS Queues and select the
rlm-cf-event-notificationqueue. - Go to Queue Policies > Edit Access policy.
- Replace the policy JSON with the following, substituting
<sqs_queue_arn>and<iam_user_arn>:
json
{
  "Version": "2012-10-17",
  "Id": "__default_policy_ID",
  "Statement": [
    {
      "Sid": "Stmt1737666508309",
      "Effect": "Allow",
      "Principal": {
        "Service": "s3.amazonaws.com"
      },
      "Action": "sqs:SendMessage",
      "Resource": "<sqs_queue_arn>"
    },
    {
      "Sid": "Stmt1737666814690",
      "Effect": "Allow",
      "Principal": {
        "AWS": "<iam_user_arn>"
      },
      "Action": [
        "sqs:ChangeMessageVisibility",
        "sqs:DeleteMessage",
        "sqs:ReceiveMessage"
      ],
      "Resource": "<sqs_queue_arn>"
    }
  ]
}- Click Save.
Configure Notifications for S3 Bucket
- Log in to the AWS console and go to S3 Buckets.
- Select the Cloudflare log bucket.
- Go to Properties > Event Notifications and click Create Event Notification.
- Fill out the event notification details:
Event name:
RlmCFCreateEventsEvent types: SelectAll object create eventsDestination:SQS QueueSQS Queue: Select the queue created above - Click Save Changes.
Azure Blob Storage
Use this transport when you are sending Cloudflare WAF logs to an Azure Blob Container.
Add an Azure Blob Storage Input Feed
- On the Select Transport Method step in the Add Source flow, or from the source page, click Add Input Feed.
- Select Azure Blob Storage and give it a name.
- Enter the Azure credentials and storage configuration:
Tenant ID:
<tenant_id>
Client ID:<client_id>
Client Secret:<client_secret>
Event Hub Namespace:<namespace>.servicebus.windows.net
Event Hub Name:<event_hub_name>
Storage Account Name:<storage_account_name>
Container Name:<container_name>
- Click Save.
Configure Azure Resources
Set up the App Registration, Event Hub, Storage Account, and Event Grid notification subscription so Azure notifies Realm when new blobs are created. Follow the Azure Blob Storage source setup guide for complete instructions.
Setup Cloudflare
In this section, you will configure Cloudflare to export logs to the S3 bucket created above.
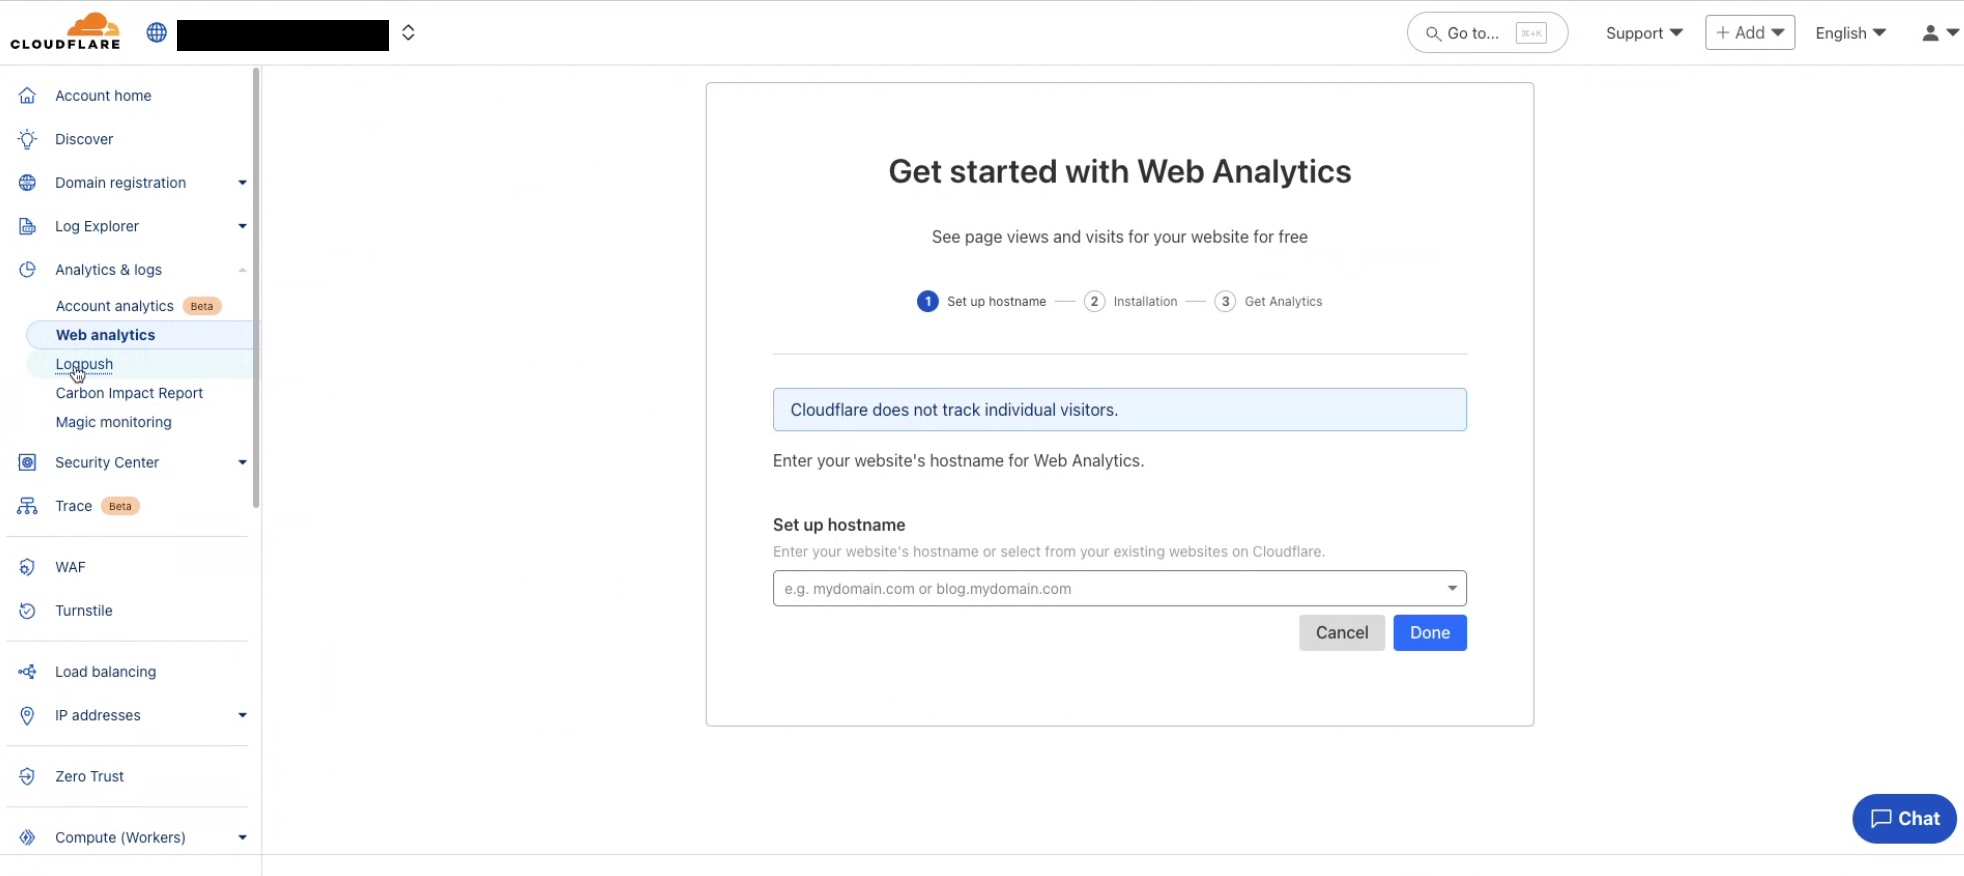
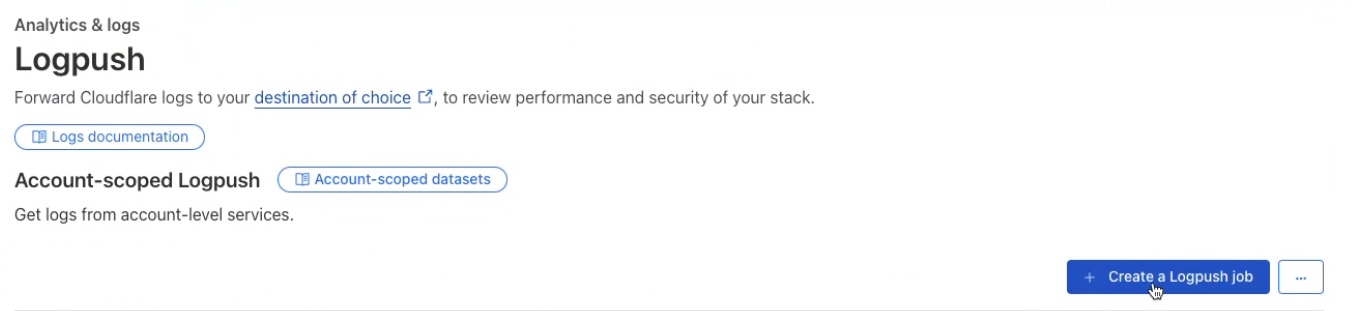
- Select Analytics & Logs > Logpush.
- Click Create a Logpush job.
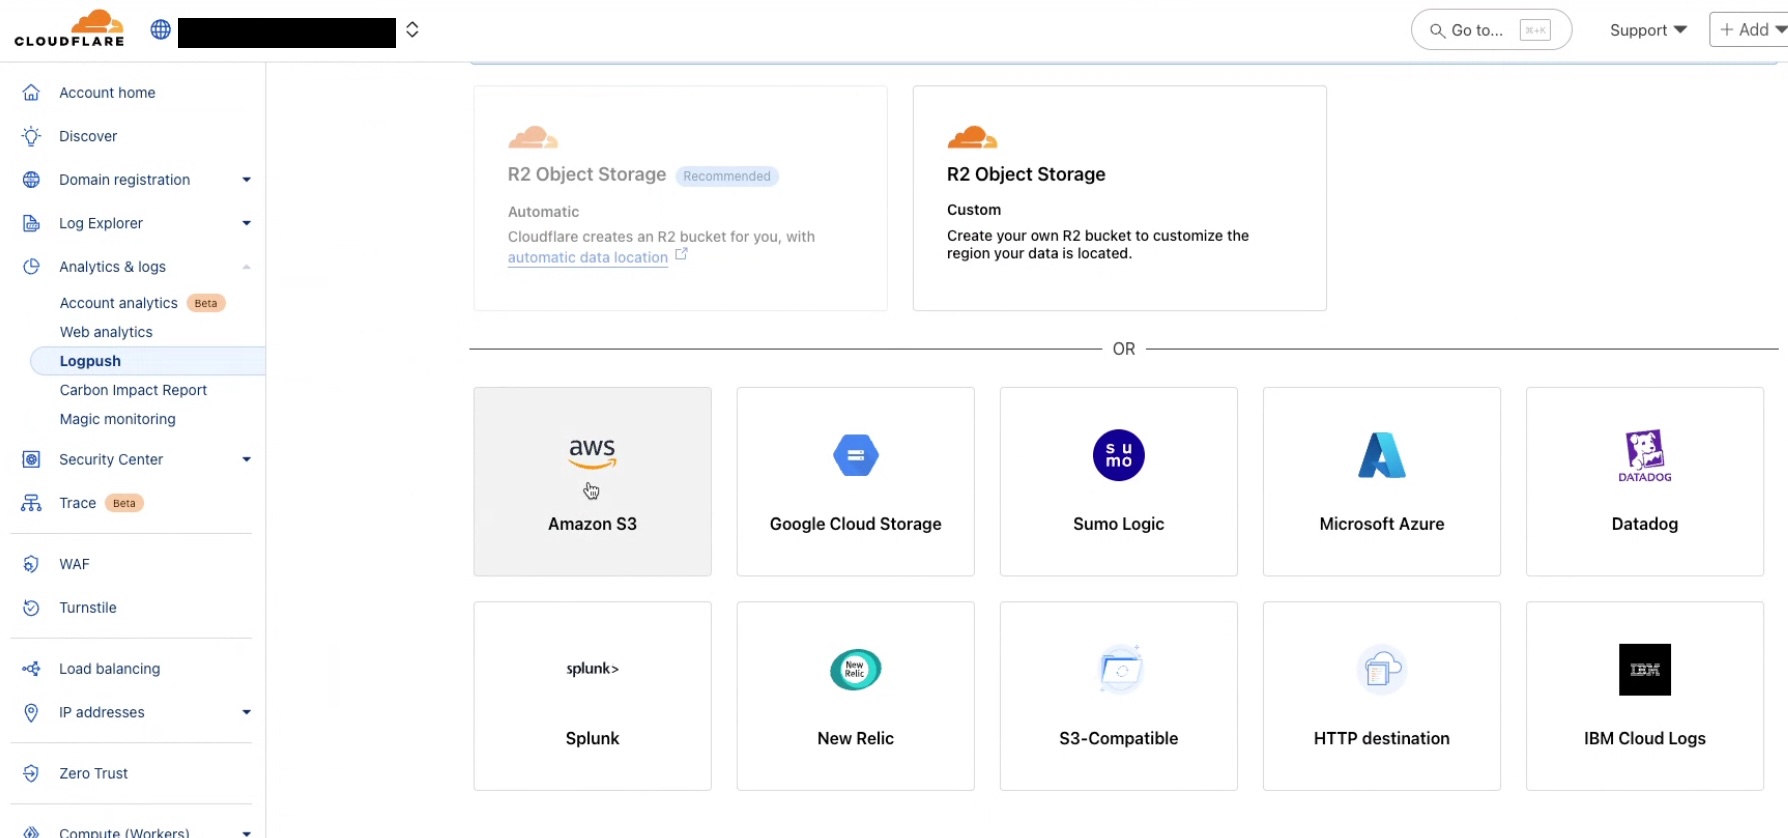
- Select Amazon S3 as the destination.
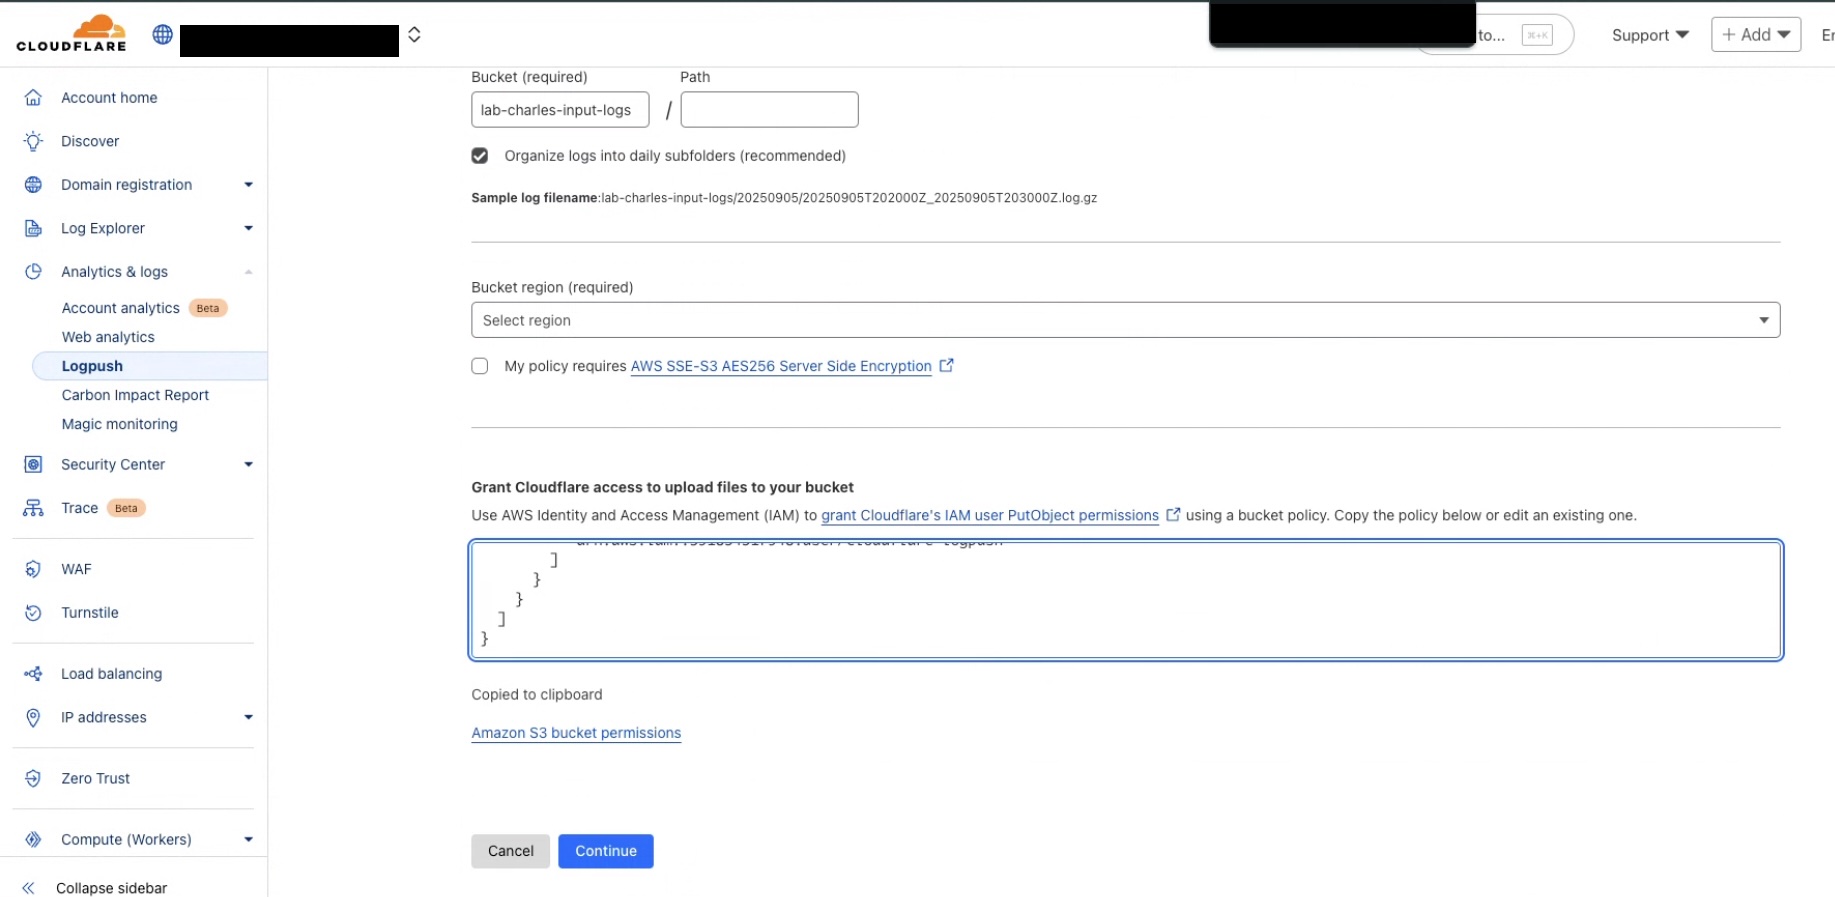
- Enter the details for the AWS S3 bucket where logs will be forwarded to.
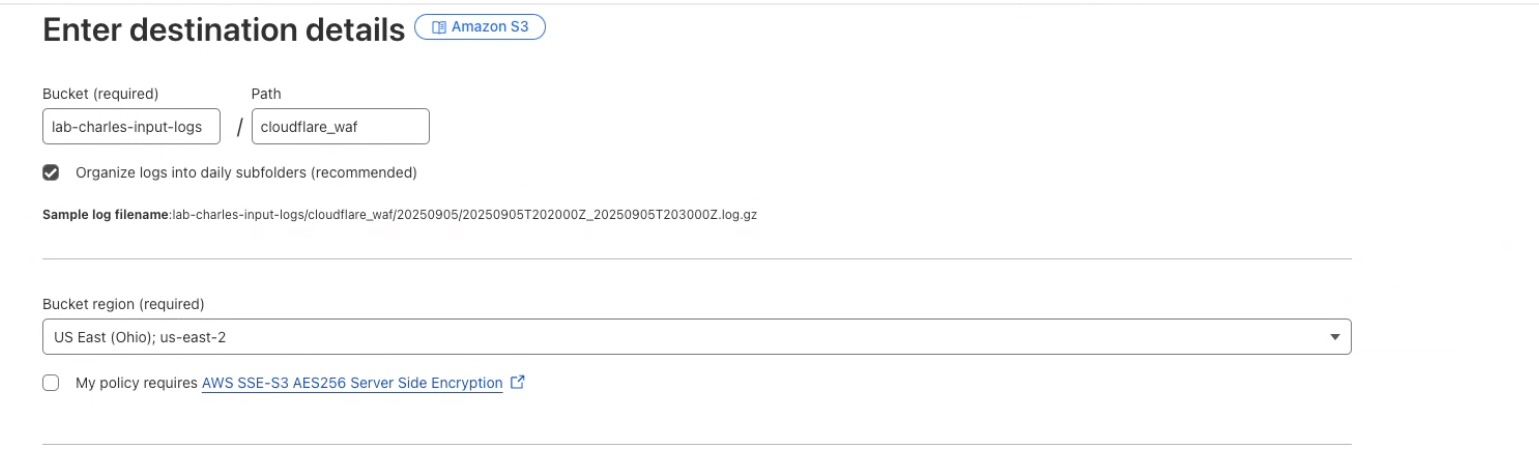
- Copy the S3 bucket permissions from the Cloudflare console and add them to the bucket in the AWS console.
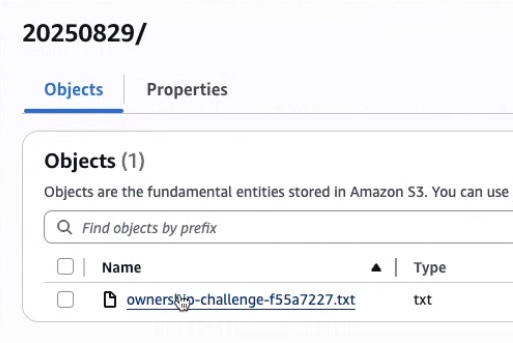
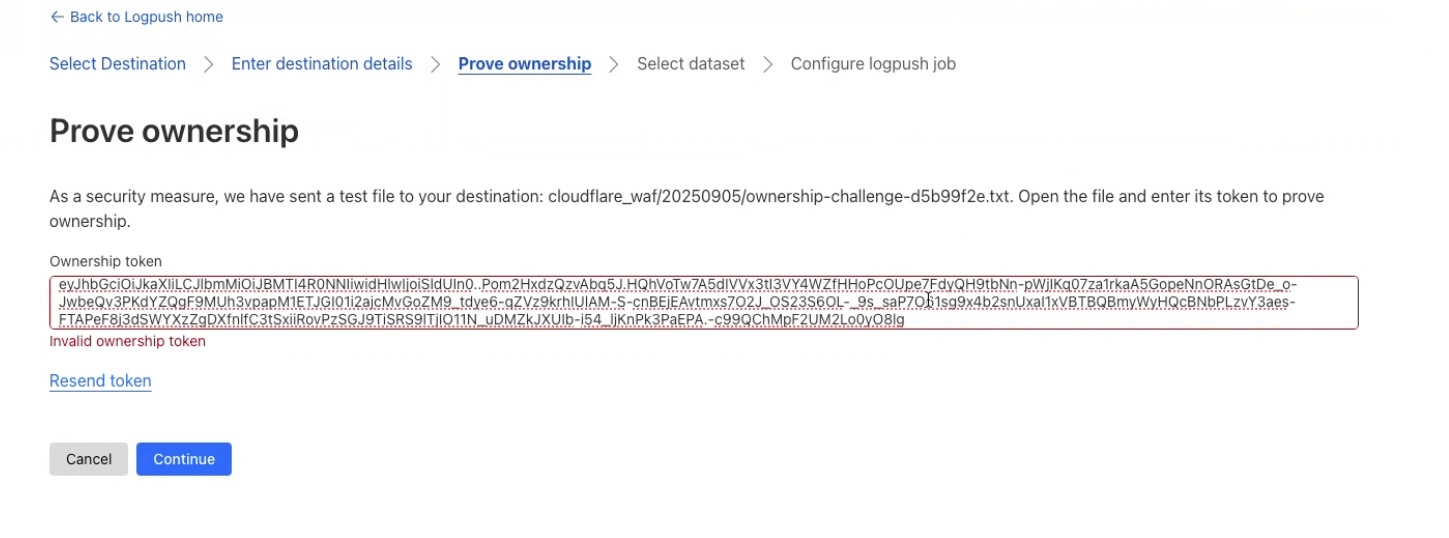
Click Continue. Cloudflare will write an ownership challenge text file to the S3 bucket.
In the AWS console, go to the S3 bucket, locate and open the file named
ownership-challenge-xxxxxxx.txt. Copy its contents.
- Paste the ownership challenge token in the Cloudflare console.
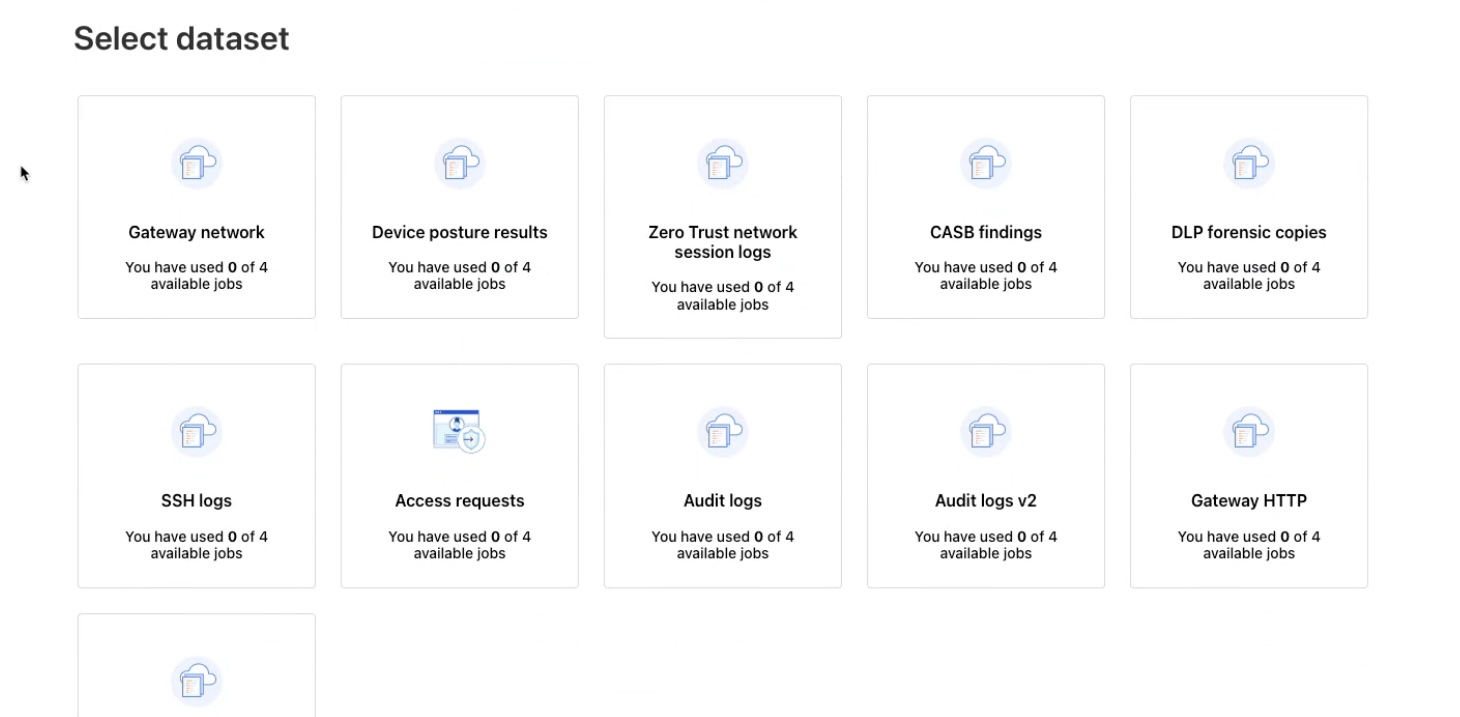
- Select one or more log datasets to push to the S3 bucket.
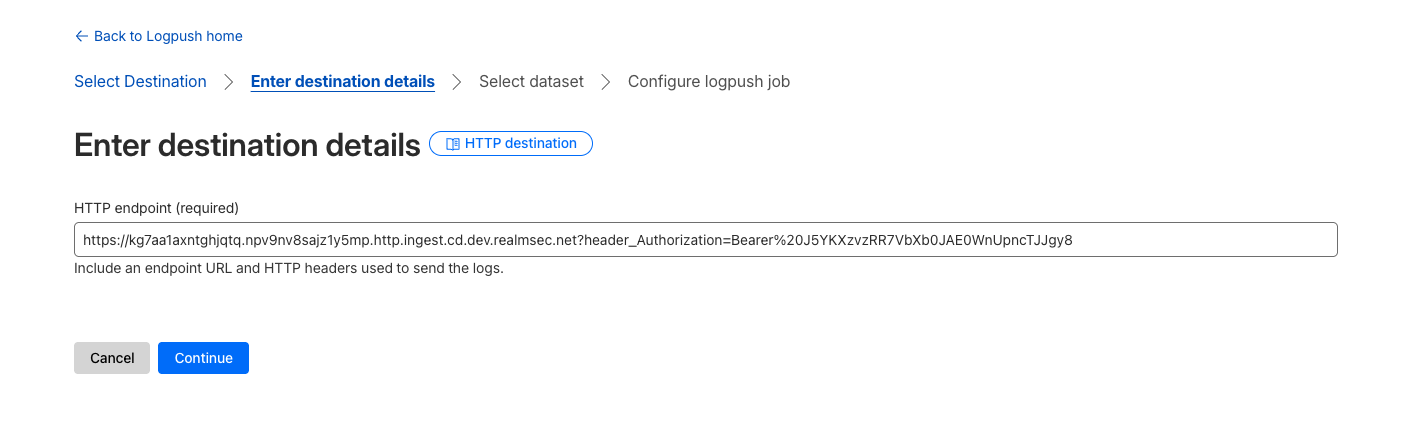
HTTP Logpush
Read more about configuring an HTTP logpush in the Cloudflare Documentation.
Prerequisites
- Administrative Access to the Cloudflare Dashboard
- Realm Cloud HTTP input feed
- Make sure to use a Public Certificate and take note of the Authentication Token
Setup Cloudflare
- Select Analytics & Logs > Logpush.
- Click Create a Logpush job.
- Select HTTP as the destination.
- Enter the URL (including
https://) of the Cloud HTTP input feed, and include the authentication header at the end of the URL:
text
https://my-url.http.ingest.cd.dev.realmsec.net?header_Authorization=Bearer%20<token>