Appearance
Get Started with Realm.Security
The fastest route to cost savings and pipeline control is through a hands-on demonstration.
Get access by requesting a platform demo.
Overview
Welcome to Realm.Security. You are now equipped with the industry's most effective AI-Native Security Data Pipeline Platform, purpose-built to eliminate downstream data overspend and data complexity.
The objective of this guide is to move you from initial access to data ingestion and automated transformation within days, not months. Once you've completed the initial setup steps below, proceed directly to the Integration Guide to create your data fabric.
Getting Started with Core Realm Modules
Realm is modular by design, allowing you to deploy what you need, when you need it.
- Realm Focus: AI assisted Log Reduction
- Realm Data Haven: Automated Data Archiving
- Realm Privacy Guard: Sensitive Data Discovery and Redaction
- Realm Enrichments: Data Enrichments for Log Sources
Using the Realm Platform
You will manage the platform through the web interface or Realm console. First piece to know is the platform is split up into two components the Realm control plane and the Realm data plane. This allows your data to be in a separated tenant to ensure data isolation across our customers.
Initial Access Setup
Initial Realm Console Access
Following the provisioning of your Realm instance, you will receive an invitation email from no-reply@realmsec.io with the subject line Welcome to the Realm. This email contains your temporary login credentials.
Action Required:
- Log in to the Console using the URL instance link and the provided credentials.
- You will be prompted to update your password after you login to Realm.
Password Policy: For platform security, Realm recommends a strong password that meets the following minimum requirements:
- Minimum 12 characters
- Includes at least 1 uppercase character
- Includes at least 1 lowercase character
- Includes at least 1 number
- Includes at least 1 symbol
Inviting Team Members
Secure your access immediately and grant access to your team. After logging in, navigate to Settings > Users to invite additional team members.
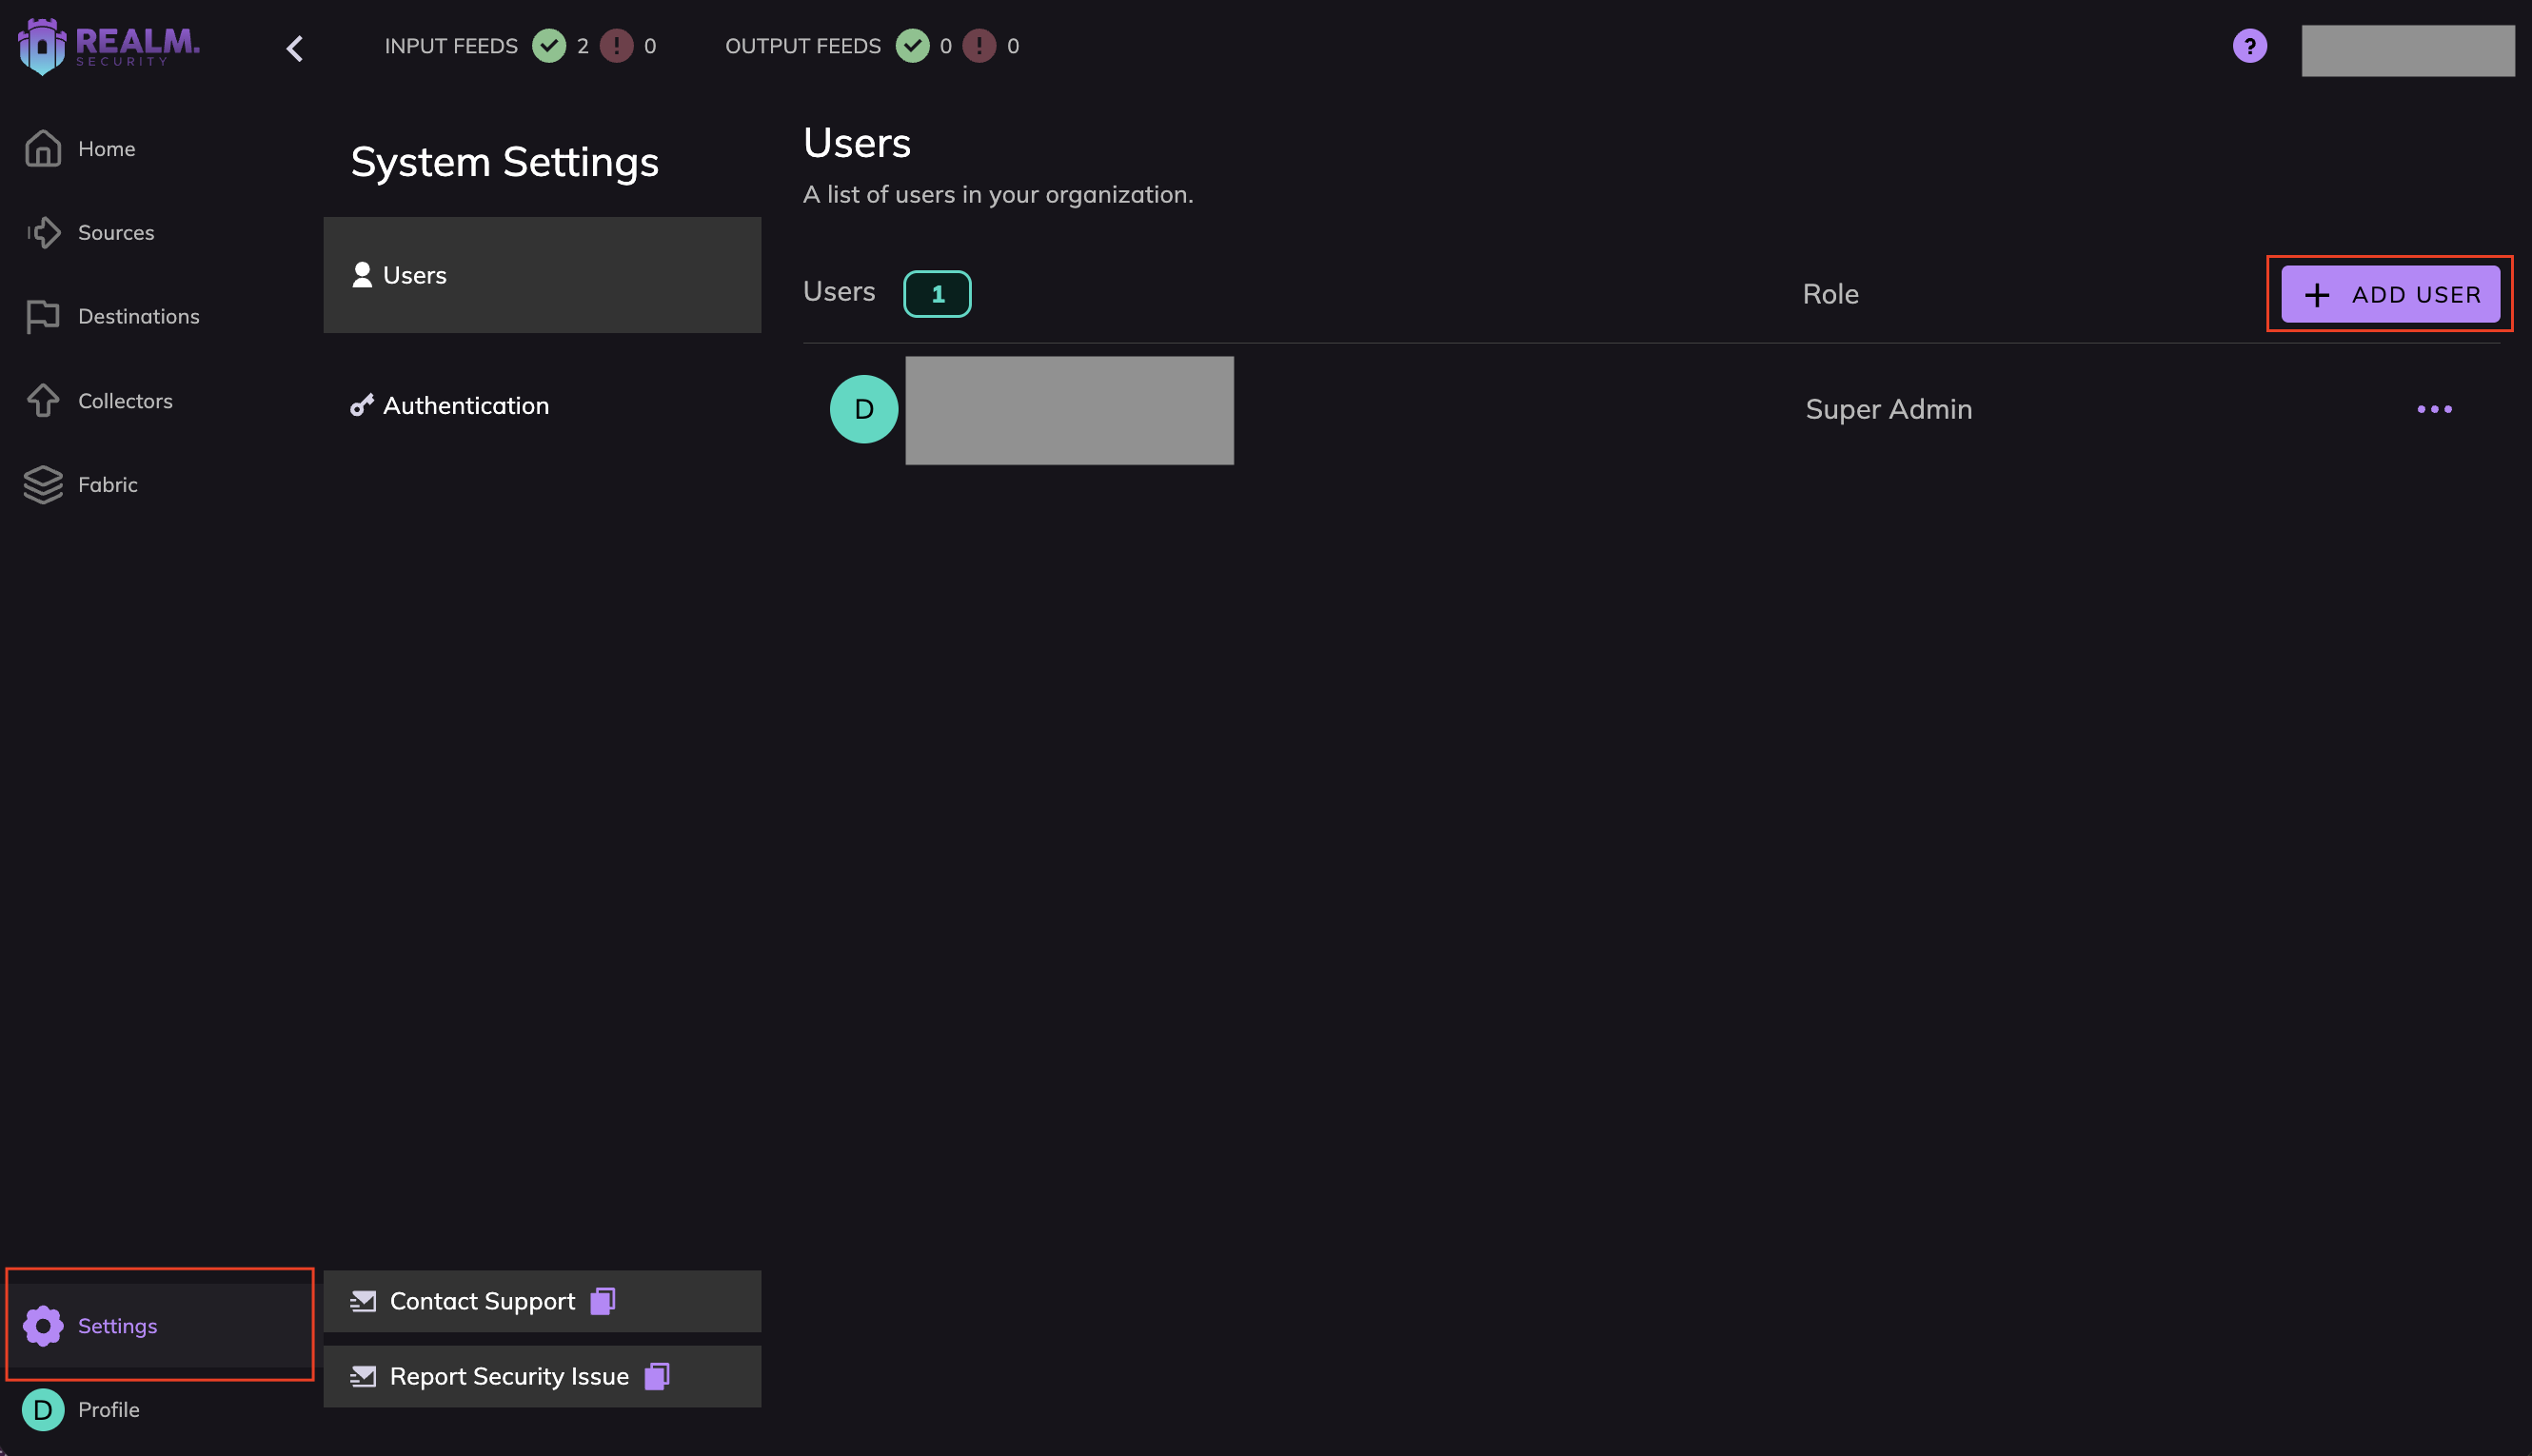
- Role Based Access Control: There are currently three role types available in Realm.
- Super Admin
- Full access to everything in Realm.
- Admin
- Can manage sources, destinations, Data Haven, rules, and collectors.
- Integration Admin
- Can configure SSO, configure input/output feeds, and credentials.
- Analyst
- Can manage rules, input/output feeds, and can search and resupply from Data Haven.
- Optimization Analyst
- Can manage log optimization rules only.
- Data Haven Analyst
- Can search and resupply data from Data Haven only.
- Read Only
- Read Only Access
- See a permission set missing for your organization? Reach out to your Customer Success team to request additional options.
- Super Admin
- Authentication Options: We recommend you visit Authentication in the Settings to standardize access control. You can manage SSO or MFA enforcement here.
Next Step: Create your Initial Data Fabric
Establishing a data fabric involves three distinct phases: defining your input, defining your output, and creating the logical connection between them. This workflow follows the Realm Data Model. During the integration of your Sources and Destinations, the fabric automatically parses incoming streams and initiates data transformations. This automated process is designed to optimize costs, satisfy compliance requirements, and enhance the capabilities of your modern SOC.
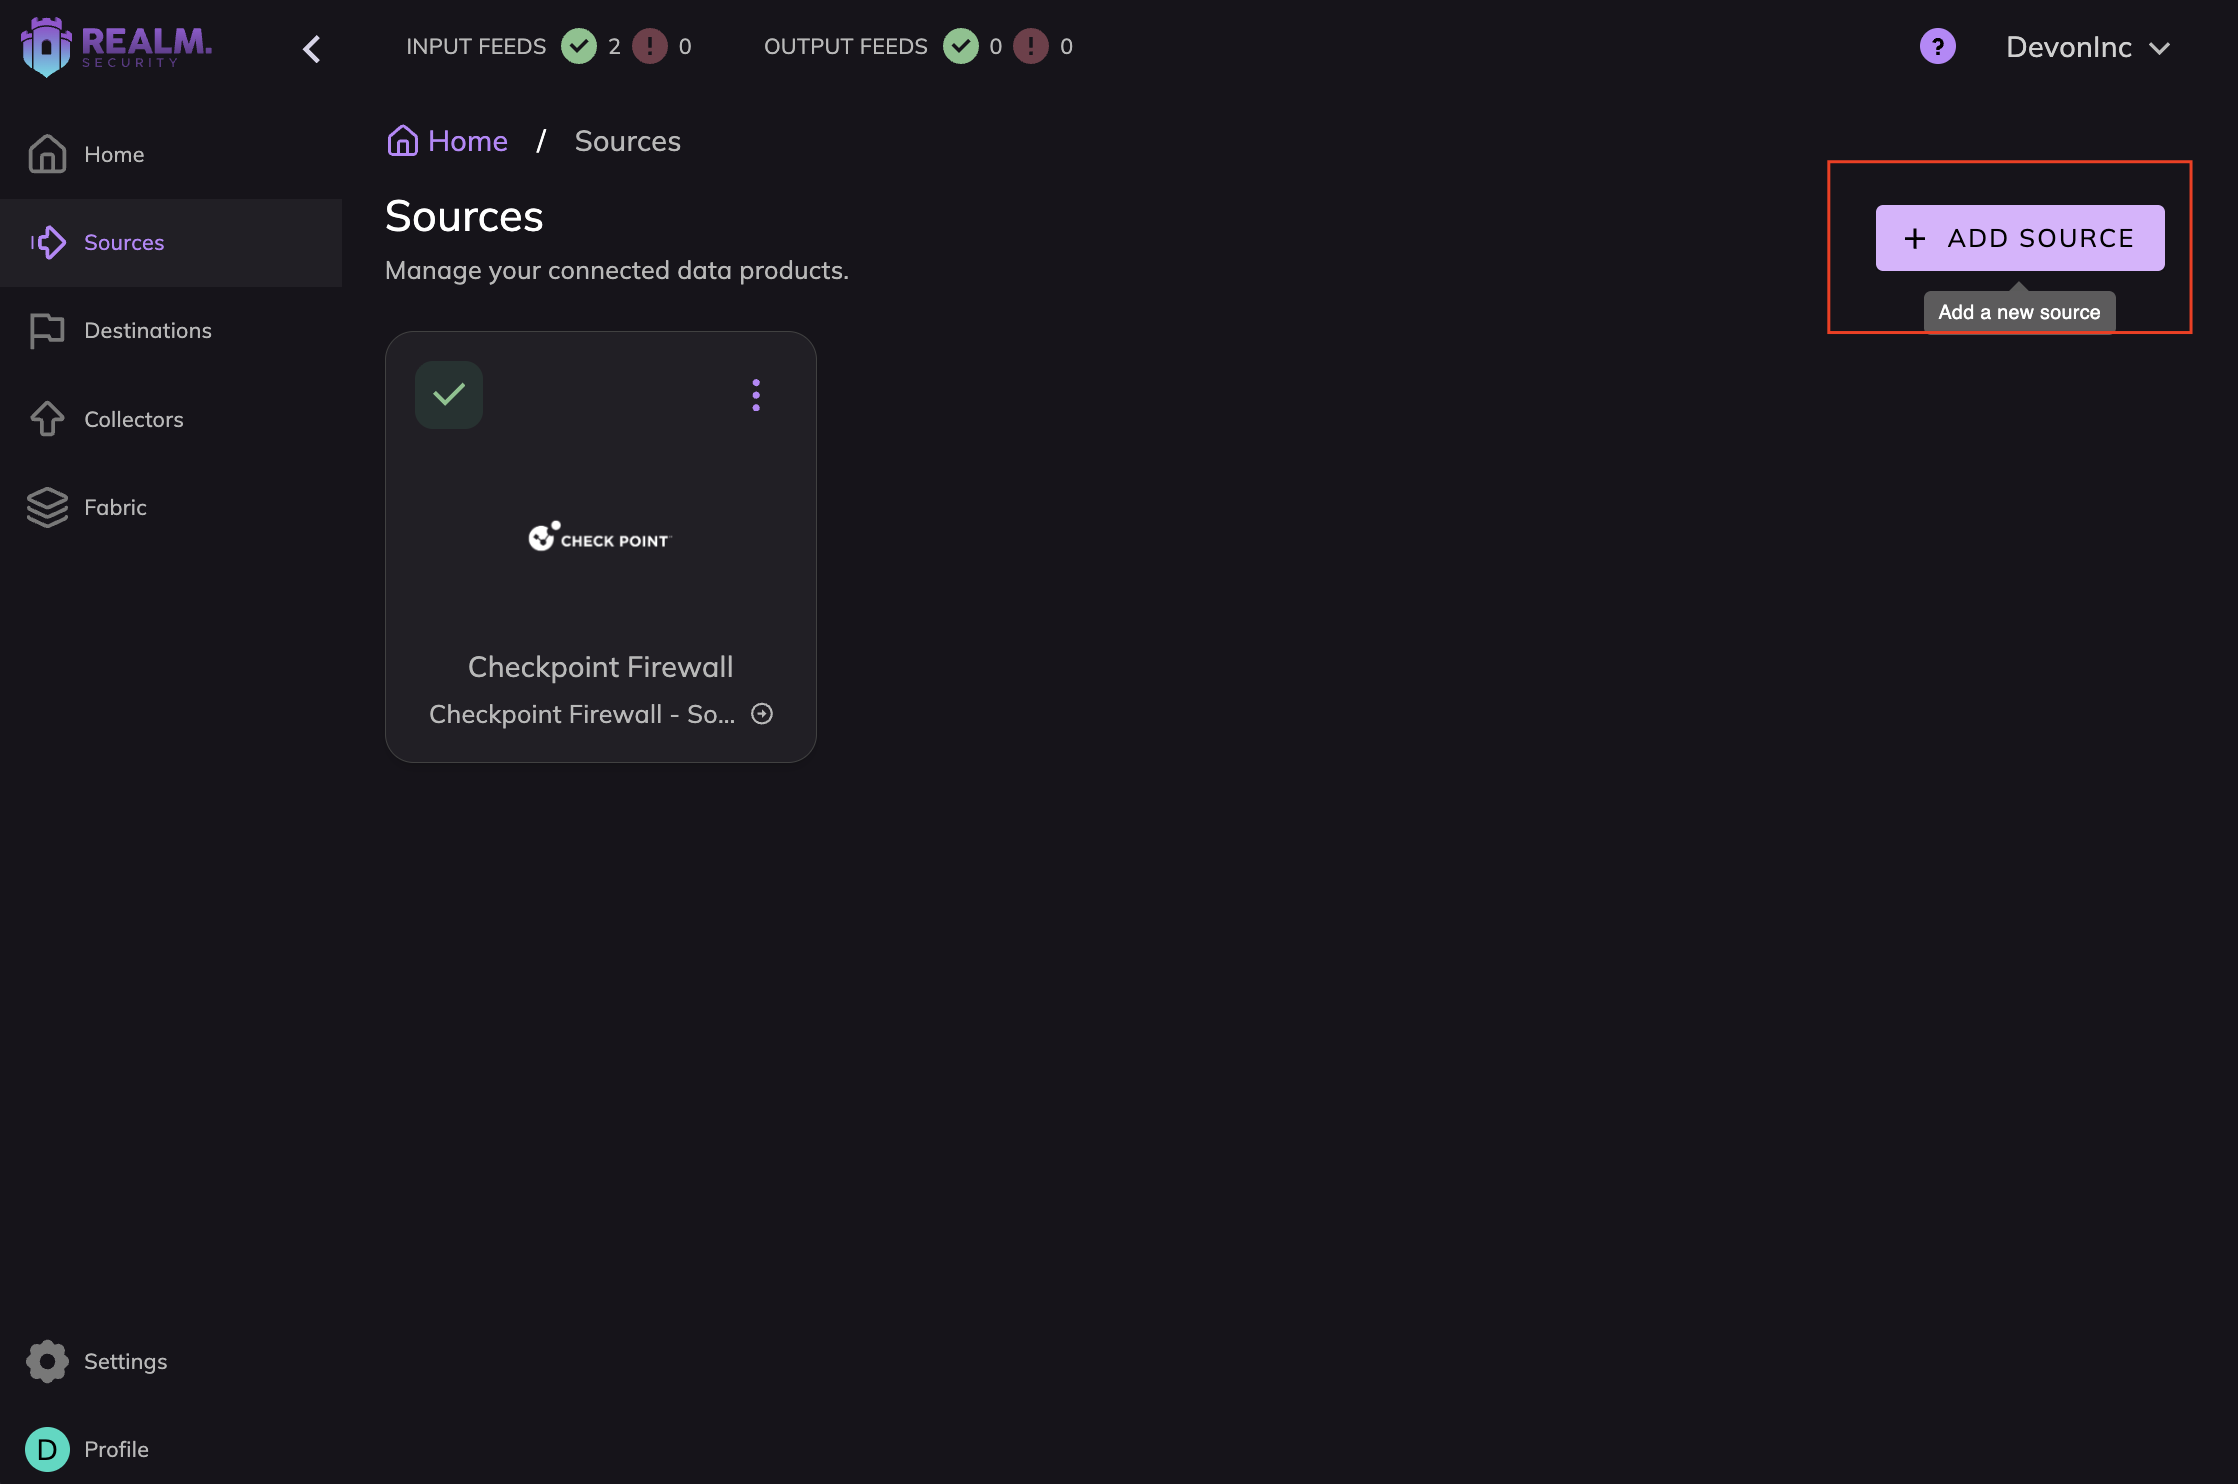
Create a Source and Input Feed
A Source acts as the parent container for your incoming telemetry streams from a specific product.
- Define Source: Navigate to the Sources page and select "Add Source."
- Add Input feed(s): Once the Source container is created, you must add one or more input feeds which would be the physical collection point. See Integration Guide for product specific instructions.
Create a Destination and Output Feed
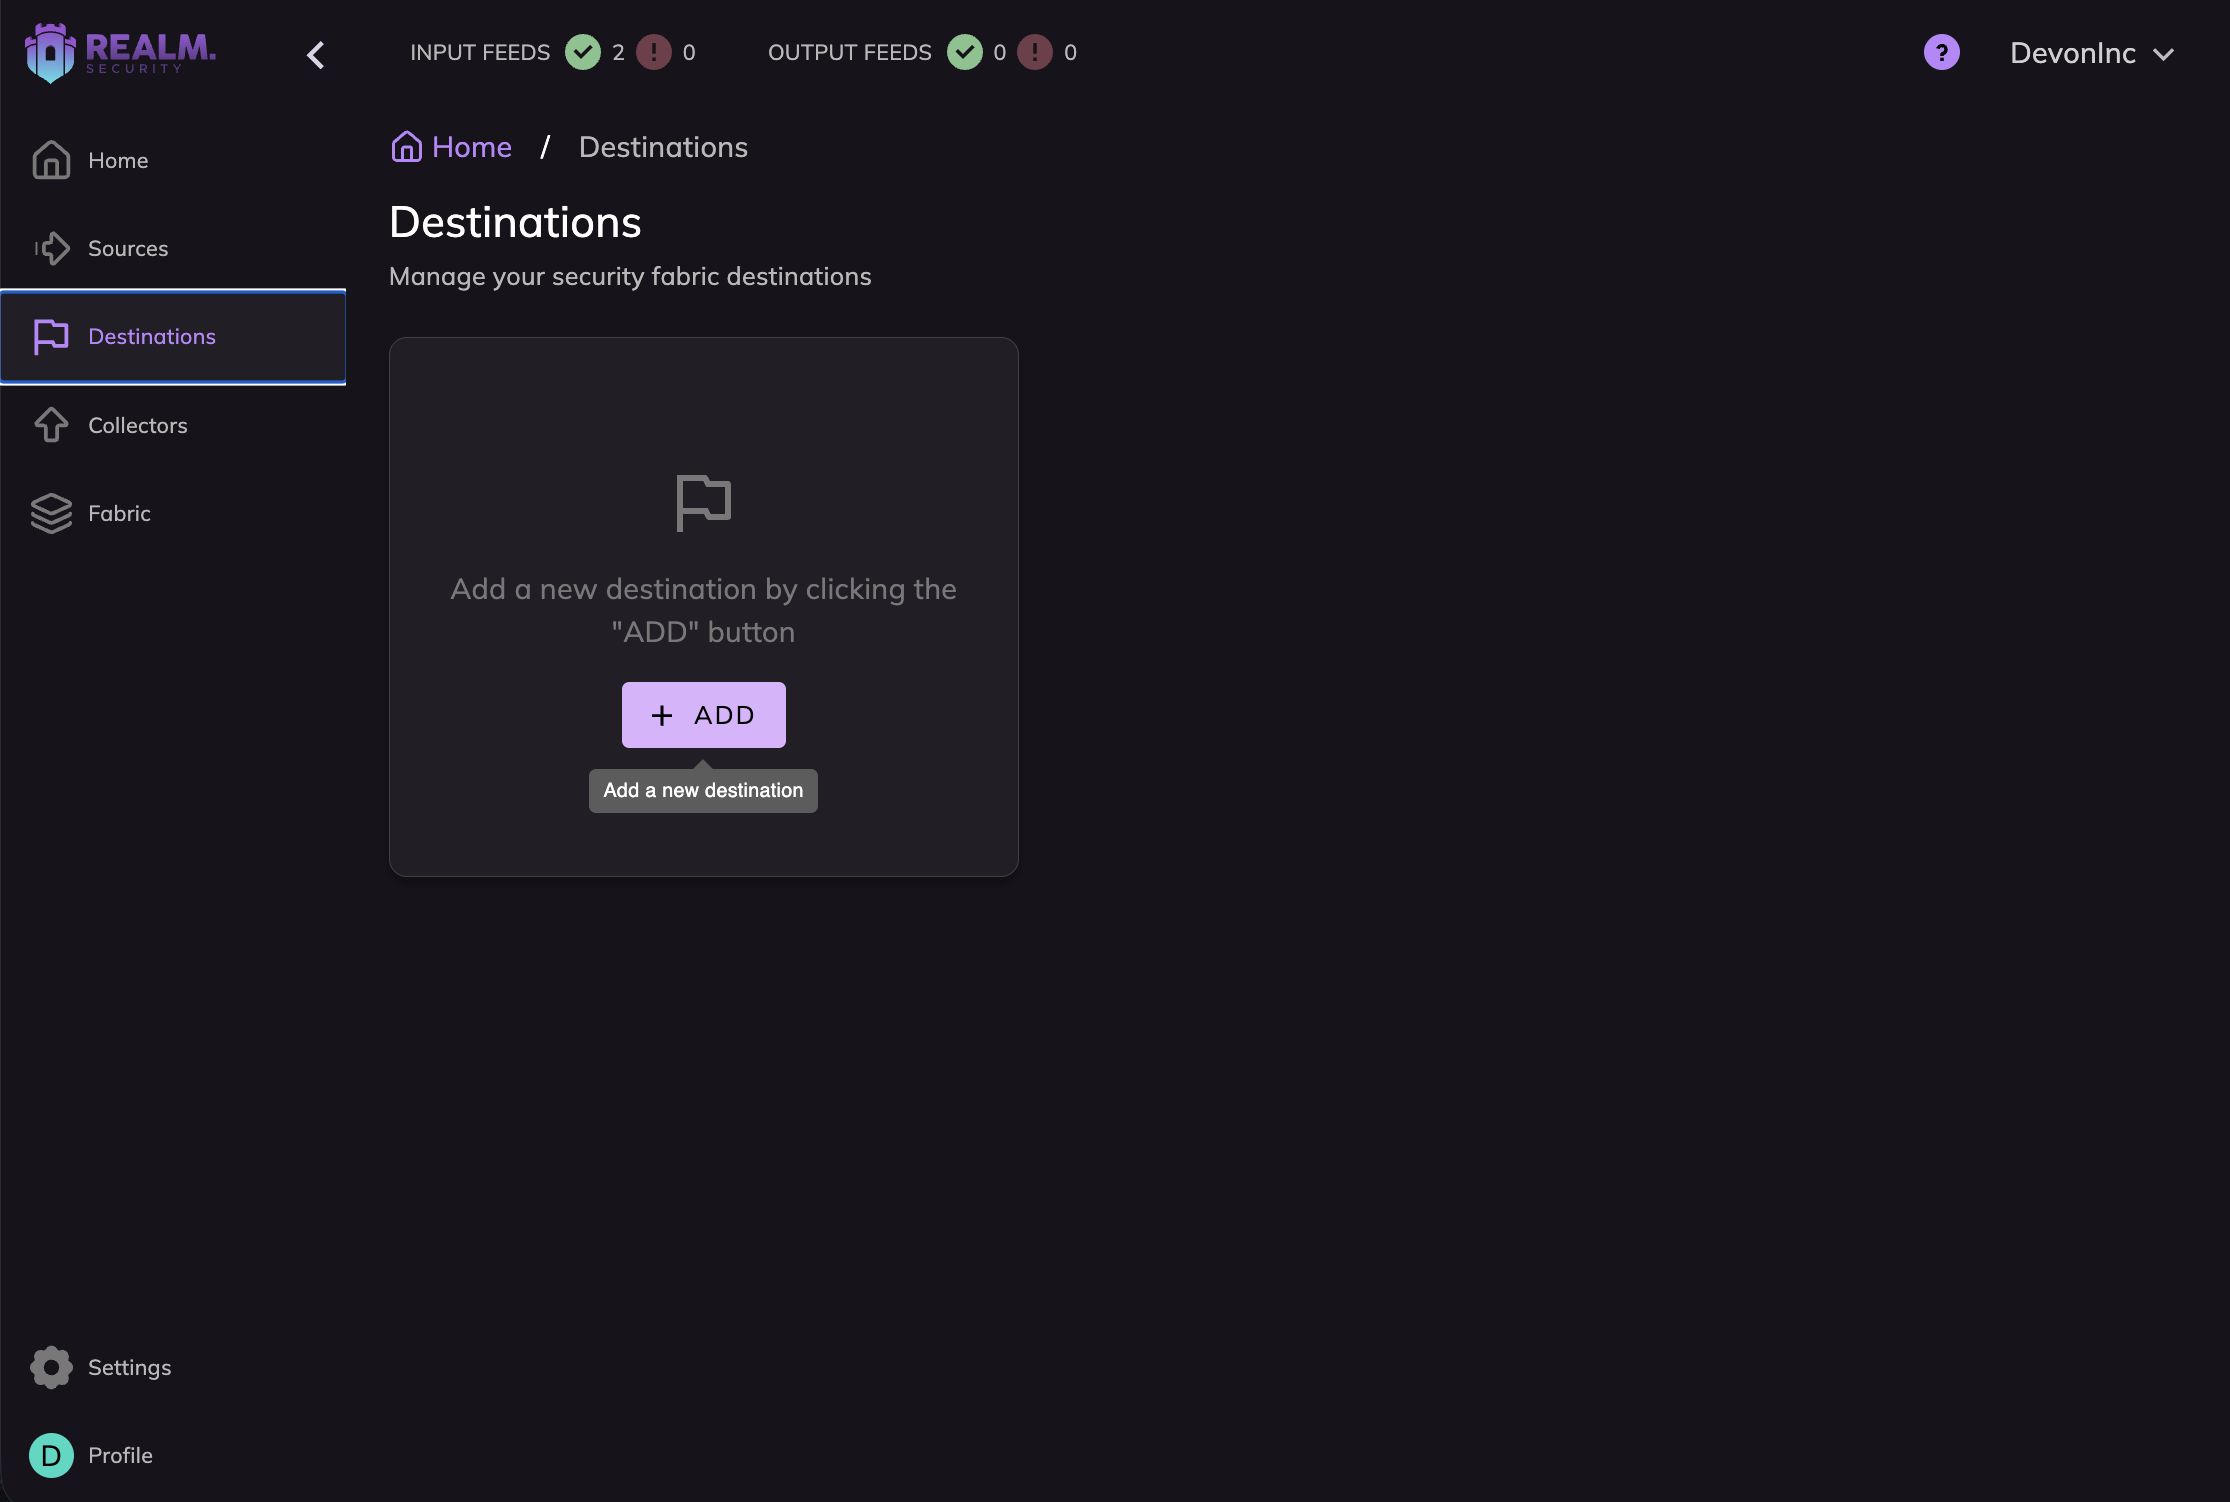
A Destination is the target environment where your Realm processed data will be shipped.
- Define Destination: Navigate to the Destinations Page "Add Destination" and choose the appropriate Type (e.g., SIEM, Data Lake, or Archive).
- Add Output Feed(s): Define the specific product that should receive data for delivery. See Integration Guide for product specific instructions.
- Initial Setup Recommendation (Blackhole): For all new fabric installations, we recommend adding an Output feed with the method set to Blackhole. This will allow you to flow data through the Fabric without sending any data directly to any tools downstream.
Connect the first Pipeline
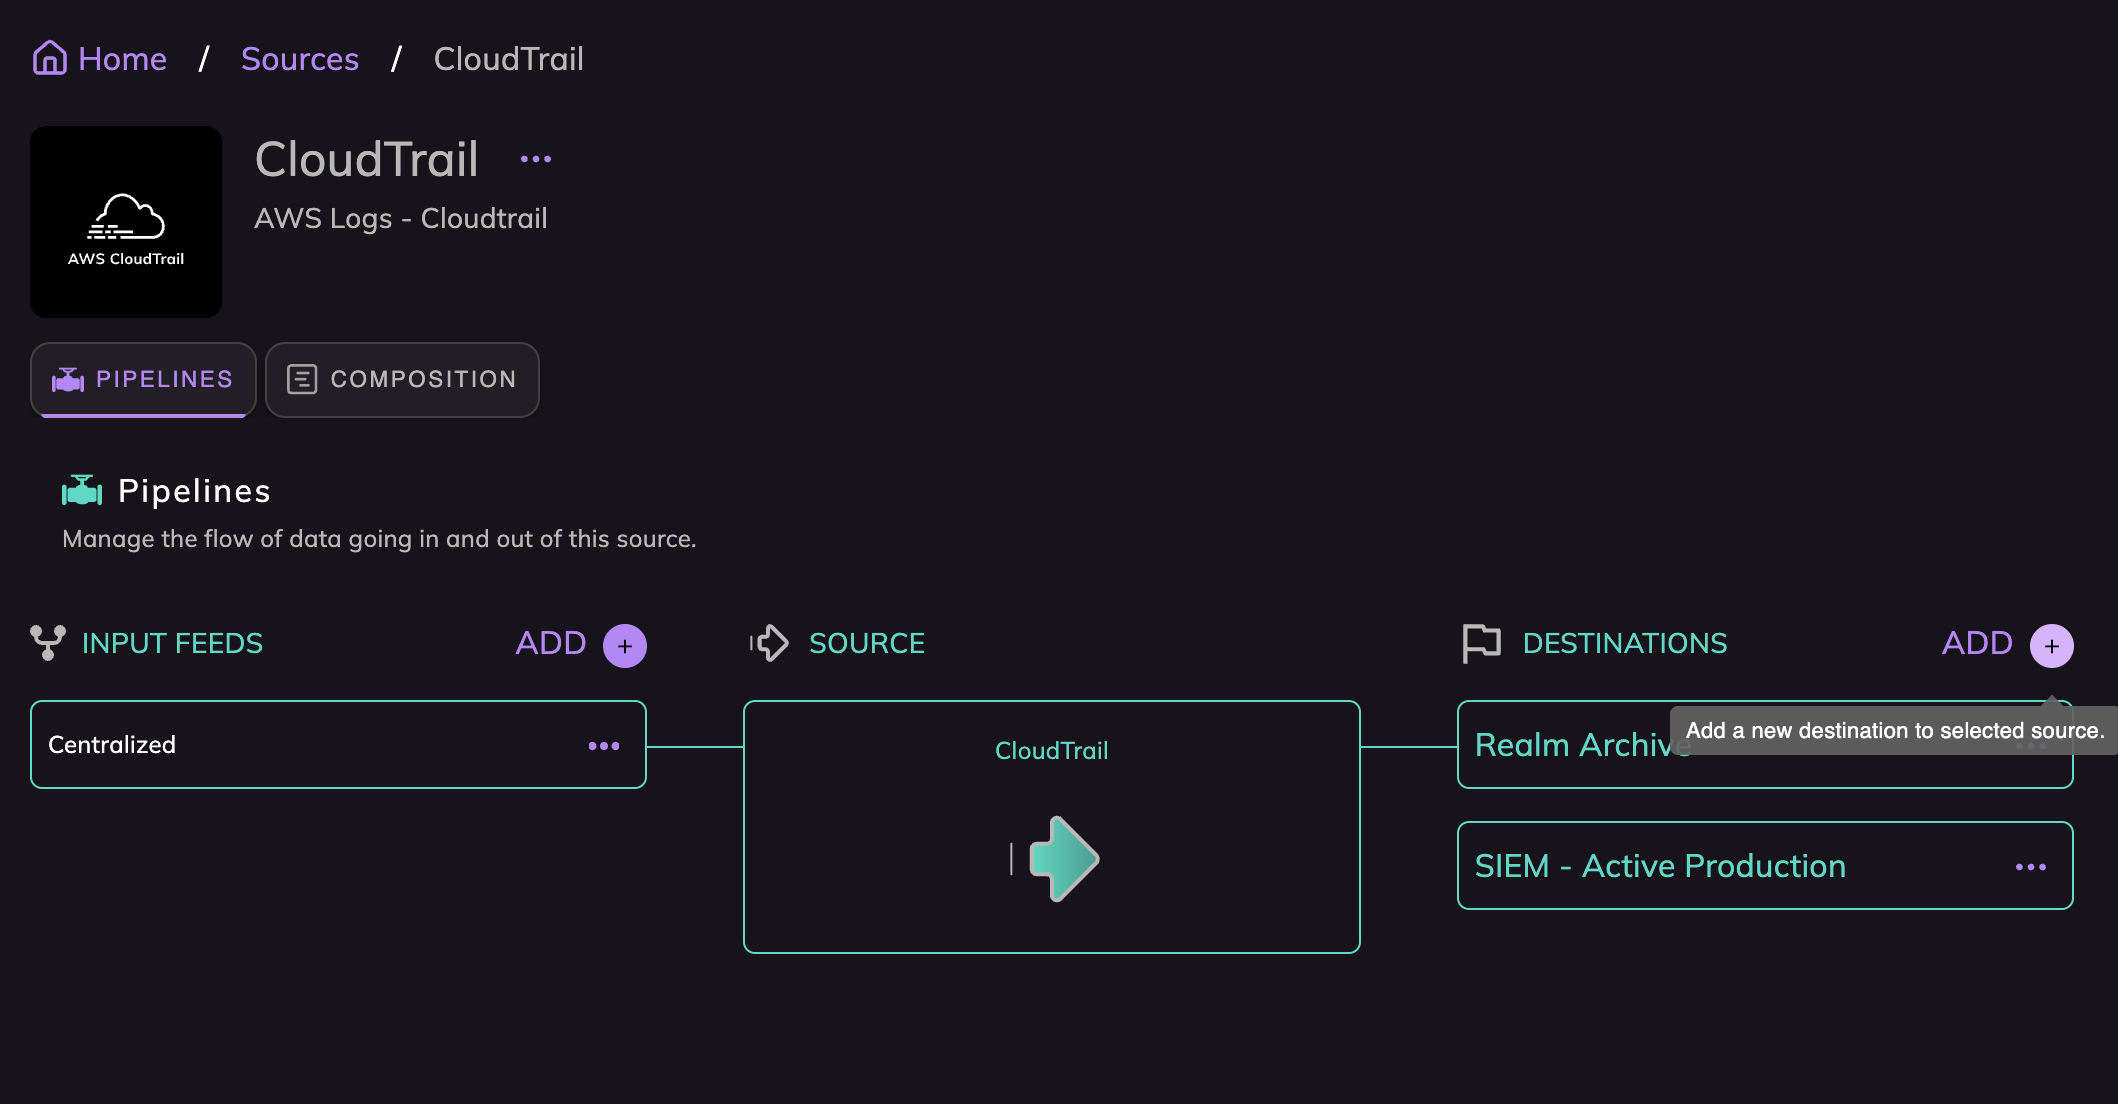
Creating Sources and Destinations establishes the "ends" of the pipe, but data will not flow until a logical connection is made.
- Making the Connection: You must explicitly link a Source to a Destination to begin the flow of data.
- Flexibility: This connection can be initiated from either the Source configuration page or the Destination configuration page.
- Visualizing the Flow: Once linked, the fabric activates the pipeline, and data moves from the input feeds through the Realm fabric to your output feeds, which you will be able to see clearly once data flows on the Fabric page