Appearance
Hydrolix Integration
Configuring Hydrolix to Receive Data
Realm Security supports integration with Hydrolix via the HTTP Streaming API for log ingestion. This guide provides instructions to configure Hydrolix to receive data from Realm.
Configuration of the Realm Collector and specific firewall sources (such as FortiGate or Palo Alto) are documented separately.
Prerequisites
- Administrator Access to Hydrolix instance
- Hydrolix Project(s) for logs to be sent to
- Hydrolix Table(s) within a Project
- Hydrolix API Token
IP Allow Listing
If your Hydrolix instance restricts access via an IP allow list, contact Realm Security for the IPs to allow. More information on IP allow lists can be seen in the Hydrolix Security Docs.
Step 1: Configure Hydrolix Transforms
For more information on configuring transforms, refer to the Hydrolix Transform Docs.
- Use
type: jsonto set the data format tojson. - Map the fields in the incoming logs to the desired output fields in the table.
Step 2: Create a Data Lake Destination in Realm for Hydrolix
- Navigate to Destinations > Add Destination.
Destination name:
Data LakeDestination Type:Data Lake - In the newly created Data Lake Destination, select Add New Source.
- Connect the relevant log source (e.g., FortiGate, Azure, etc.) to the Data Lake destination.
- Go to Output Feeds > Add Output Feed.
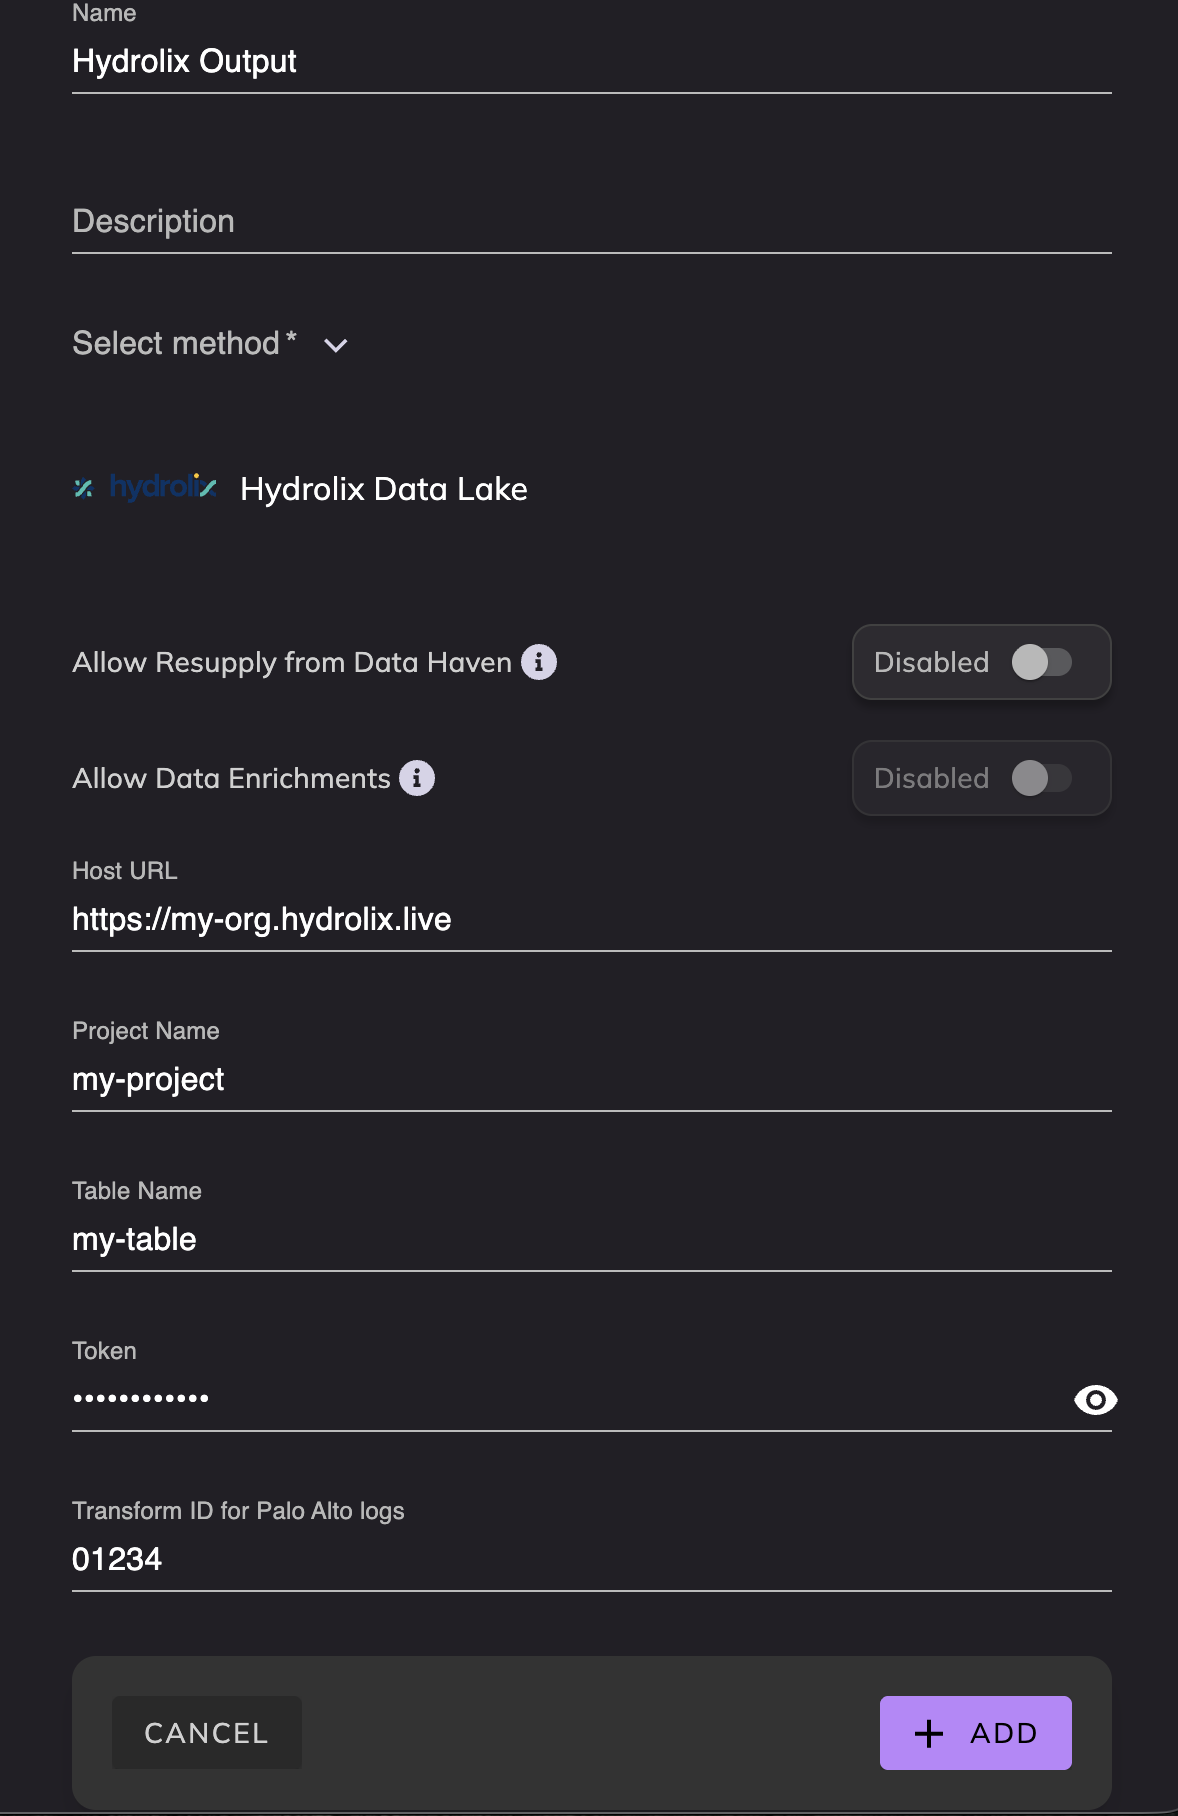
Step 3: Create Hydrolix Output Feed
- In the newly created Data Lake Destination, select Add New Output Feed.
- Choose
Hydrolix Data Lakeand enter the host URL of your Hydrolix instance, project name, table name, API token, and transform IDs for each source.
Related Resources
- For more information on configuring the Hydrolix platform, refer to the Hydrolix Documentation.
- For additional support, contact Realm Security.