Appearance
Rule Editor Guide
The Rule Editor within Realm Focus provides a unified interface for designing, filtering, and refining security telemetry. By building conditional rules, you can eliminate noise and control pipeline volumes before your logs are forwarded to their final destination.
This guide walks you through the step-by-step workflow of creating, configuring, and testing rules.
Step 1: Add or Edit a Rule
To access the rule editor workspace:
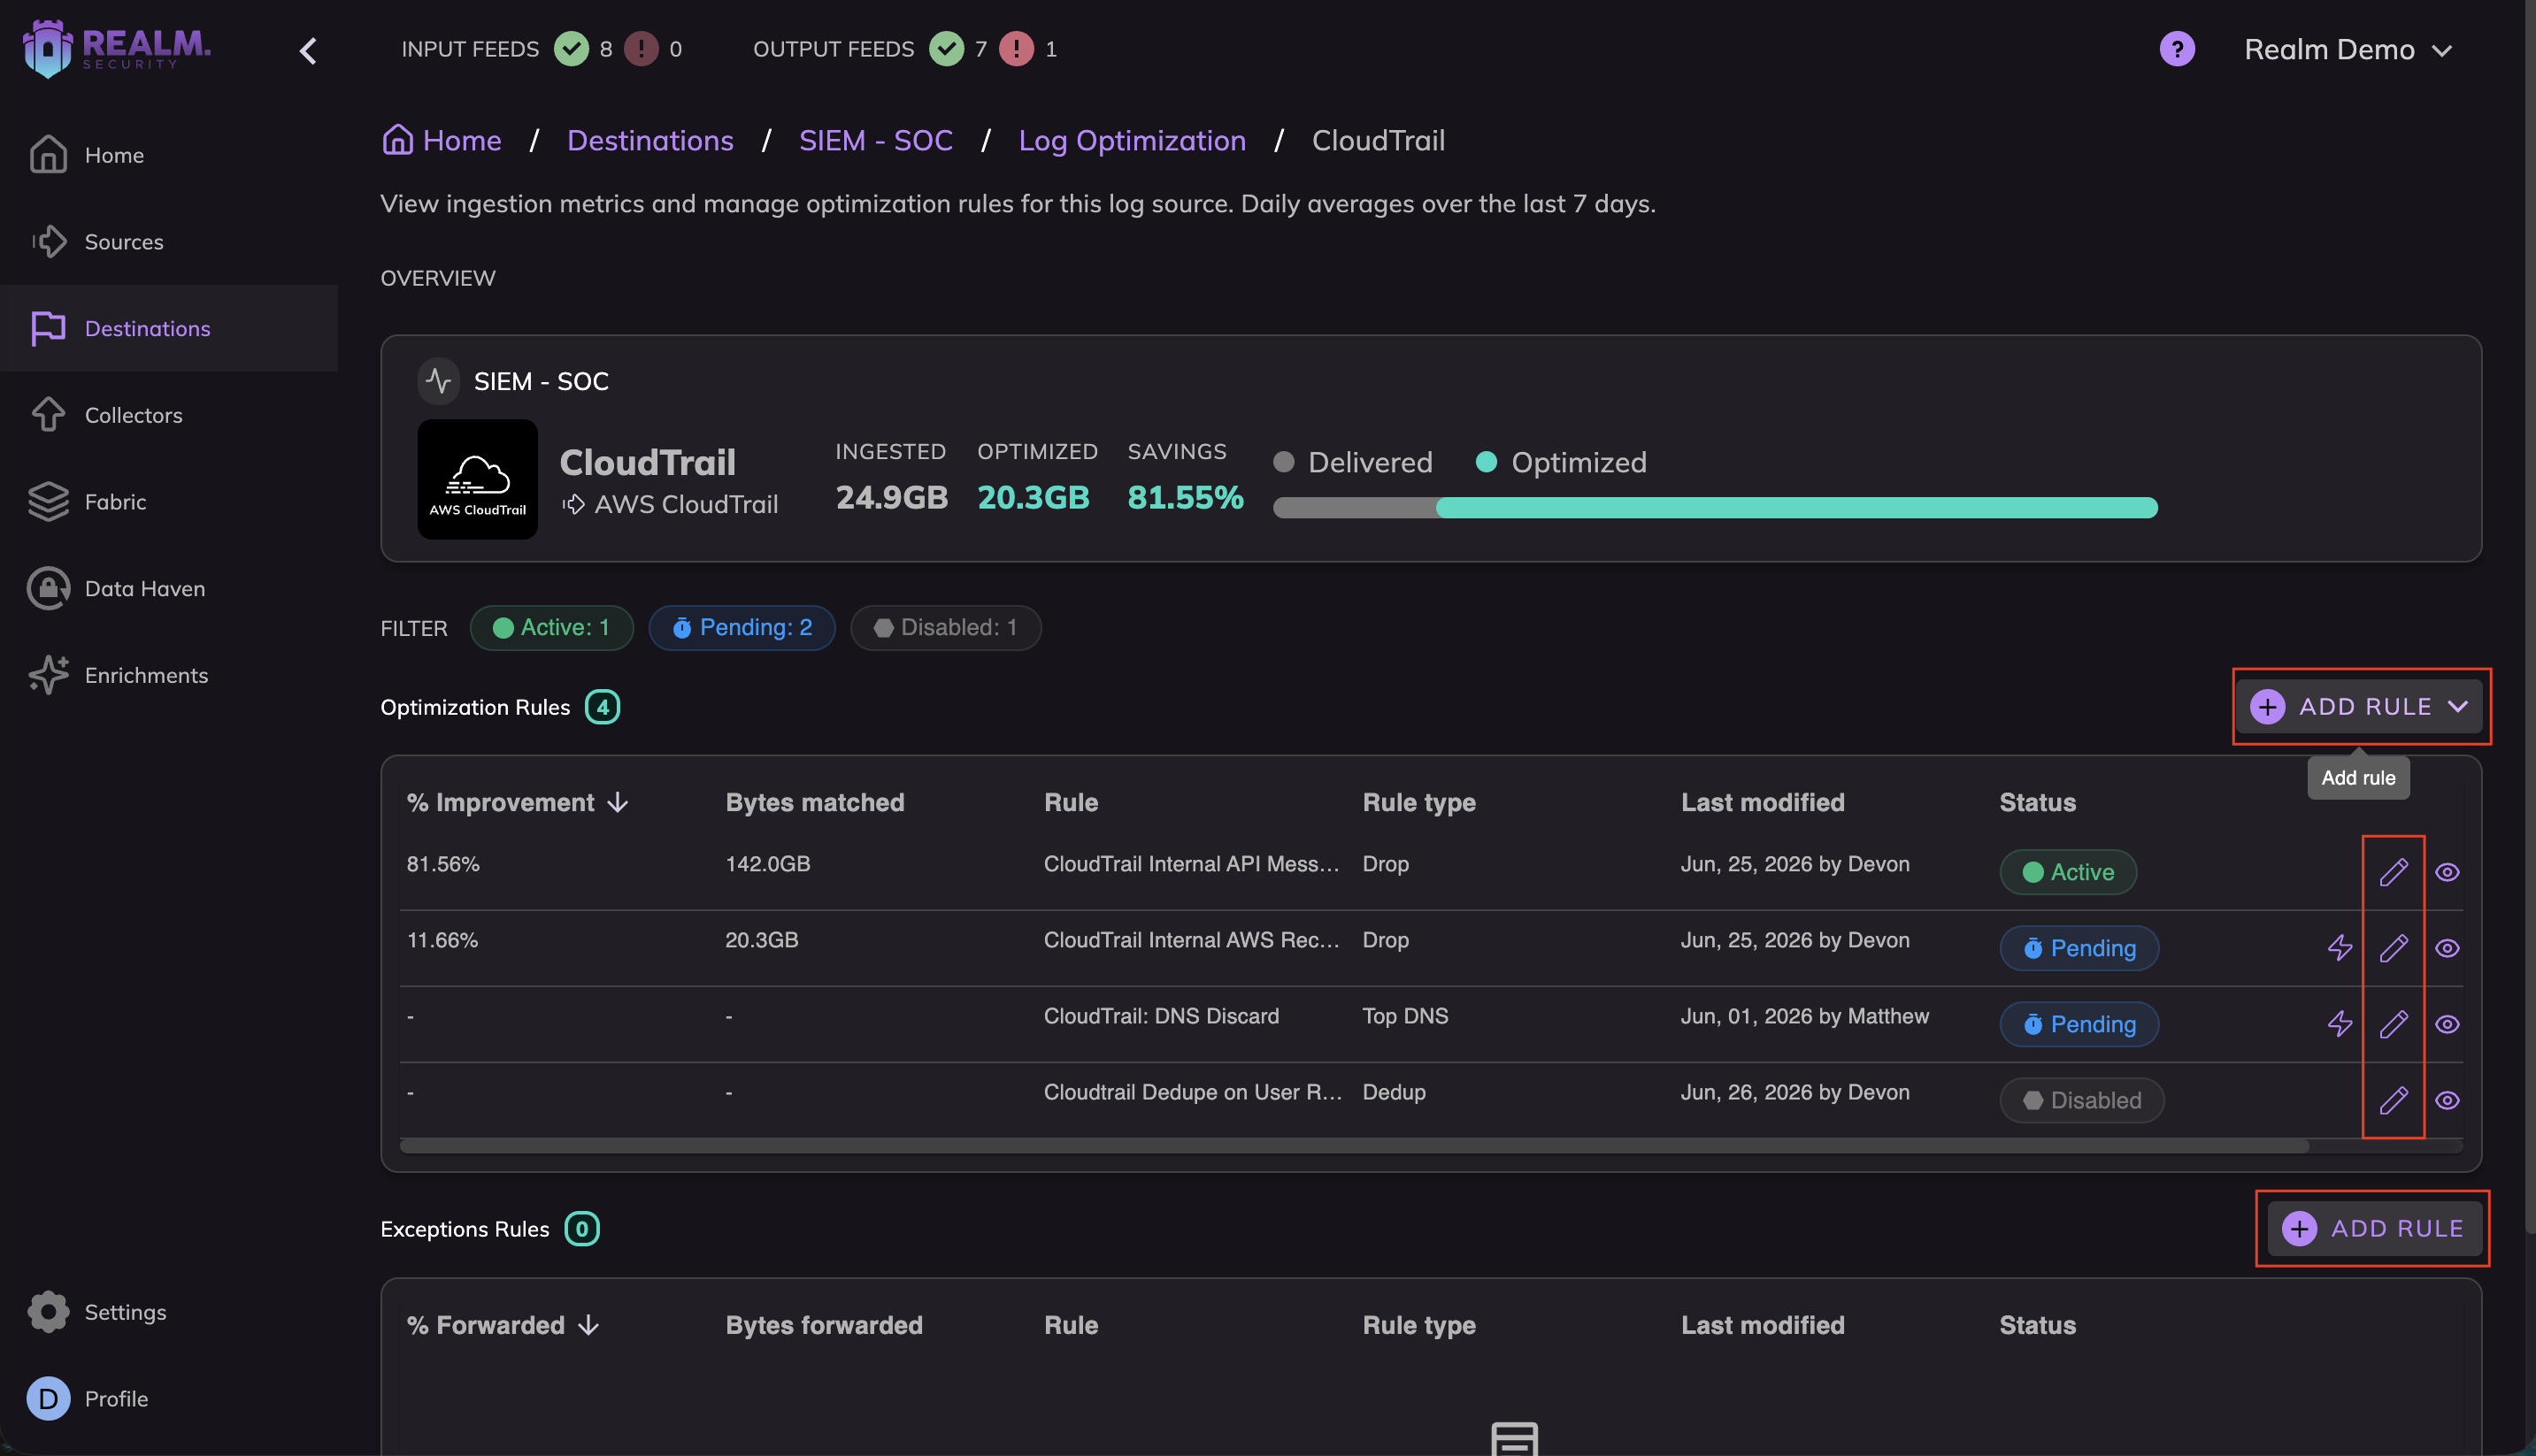
- Navigate to the Log Optimizaion tab underneath your Destination of choice.
- Select your target Source.
- Click Add Rule to open the creation modal, or select an existing rule from the optimization table to edit.
Step 2: Configure Rule
Before building logic, establish the rule's basic configurations:
- Rule Name: Provide a clear, descriptive name reflecting the rule's operational intent (e.g., Drop AWS CloudTrail Read-Only Noise).
- Source: Select the incoming log Source to which this rule will apply (e.g., EDR Logs, AWS CloudTrail, Azure Event Hub).
- Rule Description: Describe the technical or business justification for this rule for future auditability.
Step 3: Configure Rule Match Conditions
The core power of the Rule Editor lies in its conditional logic engine. Conditions dictate which events trigger the rule. You can build highly nested, complex logic trees using logical groups, standard attributes, and nested list criteria.
A. Selecting a Logical Group Type
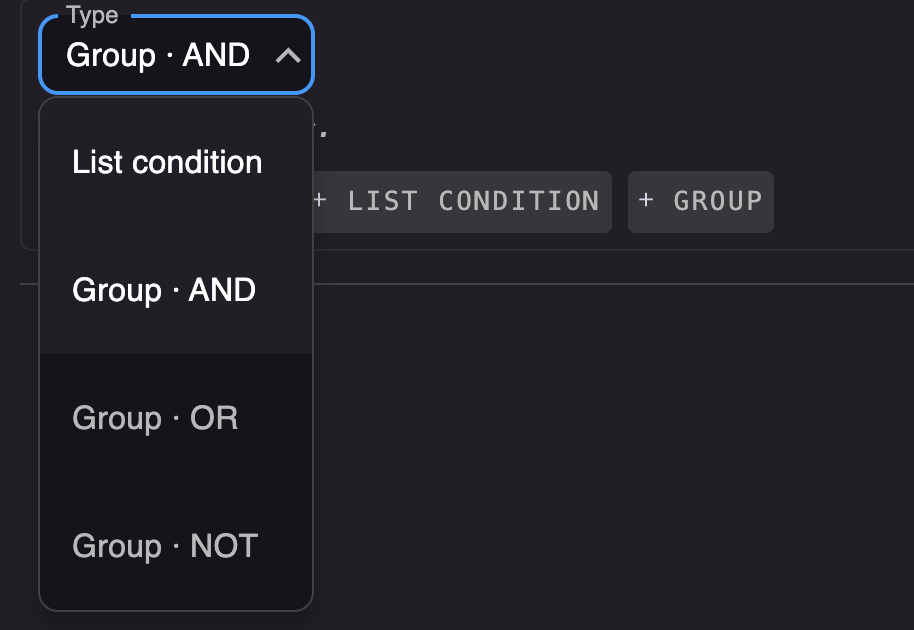
Every condition lives inside a logical group block. Use the Type dropdown to define how multi-conditional trees evaluate:
- Group · AND: Evaluates to true only if every condition inside this block is met.
- Group · OR: Evaluates to true if at least one condition inside this block is met.
- Group · NOT: Inverts the result of the group block; evaluates to true only if the criteria inside are not met.
B. Building Standard Conditions
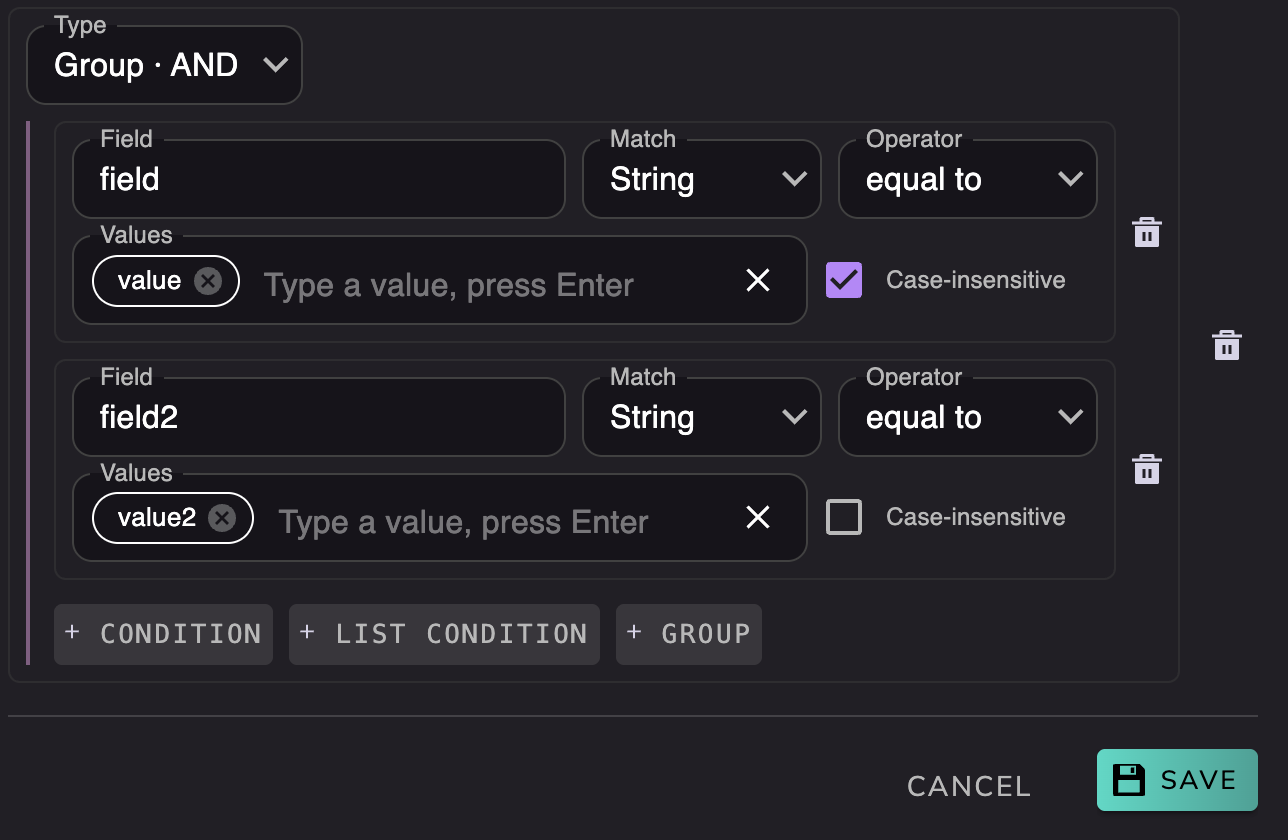
Click + CONDITION to evaluate standard, single-value fields in your log flow.
- Field: Enter the field value of the telemetry to inspect (e.g., event.outcome or network_ip).
- Match: Choose how the system interprets the data type of your chosen field:
- String: For plain text parsing. Includes an option to toggle Case-insensitive matching.
- Number: For matching specific numerical fields (e.g., HTTP status codes like 404 or 500).
- Boolean: For checking explicit true or false flags.
- IP: Evaluates network primitives, automatically recognizing IPv4/IPv6 values or CIDR blocks (e.g., 10.0.0.0/8).
- Presence: Checks whether a field key simply exists or does not exist within the payload structure. Selecting Presence automatically hides the Value field, focusing purely on field visibility.
- Operator: Select the comparison logic:
- For String -
equal to/not equal to/contains/starts with/ends with - For Number -
equal to/not equal to/greater than/greater than or equal to/less than/less than or equal to - For Boolean -
true/false - For IP -
equal to/not equal to/in IP subnet - For Presence -
exists/missing or blank
- For String -
- Values: Enter your query match targets. Multiple values can be inputted to match against the target criteria.
C. Traversing Arrays via List Conditions
Standard conditions struggle with modern, complex telemetry models (like AWS CloudTrail or Azure Event Hub logs) that store variables inside nested JSON arrays. Standard dot paths cannot query inside these arrays without breaking.
To target these properties, click + LIST CONDITION:
- List field: Define the field name path of the array object.
- Quantifier: Select how strictly the array elements must be evaluated:
- ANY (at least one): The list condition evaluates to true if any single item within the array matches the sub-condition.
- ALL: The list condition evaluates to true only if every single item in the array matches the sub-condition.
- Sub-Condition: Build the condition that evaluates individual attributes within each object of the array (e.g., evaluating userIdentity.type inside the Records array).
Step 4: Evaluate the Rule Against Event Captures
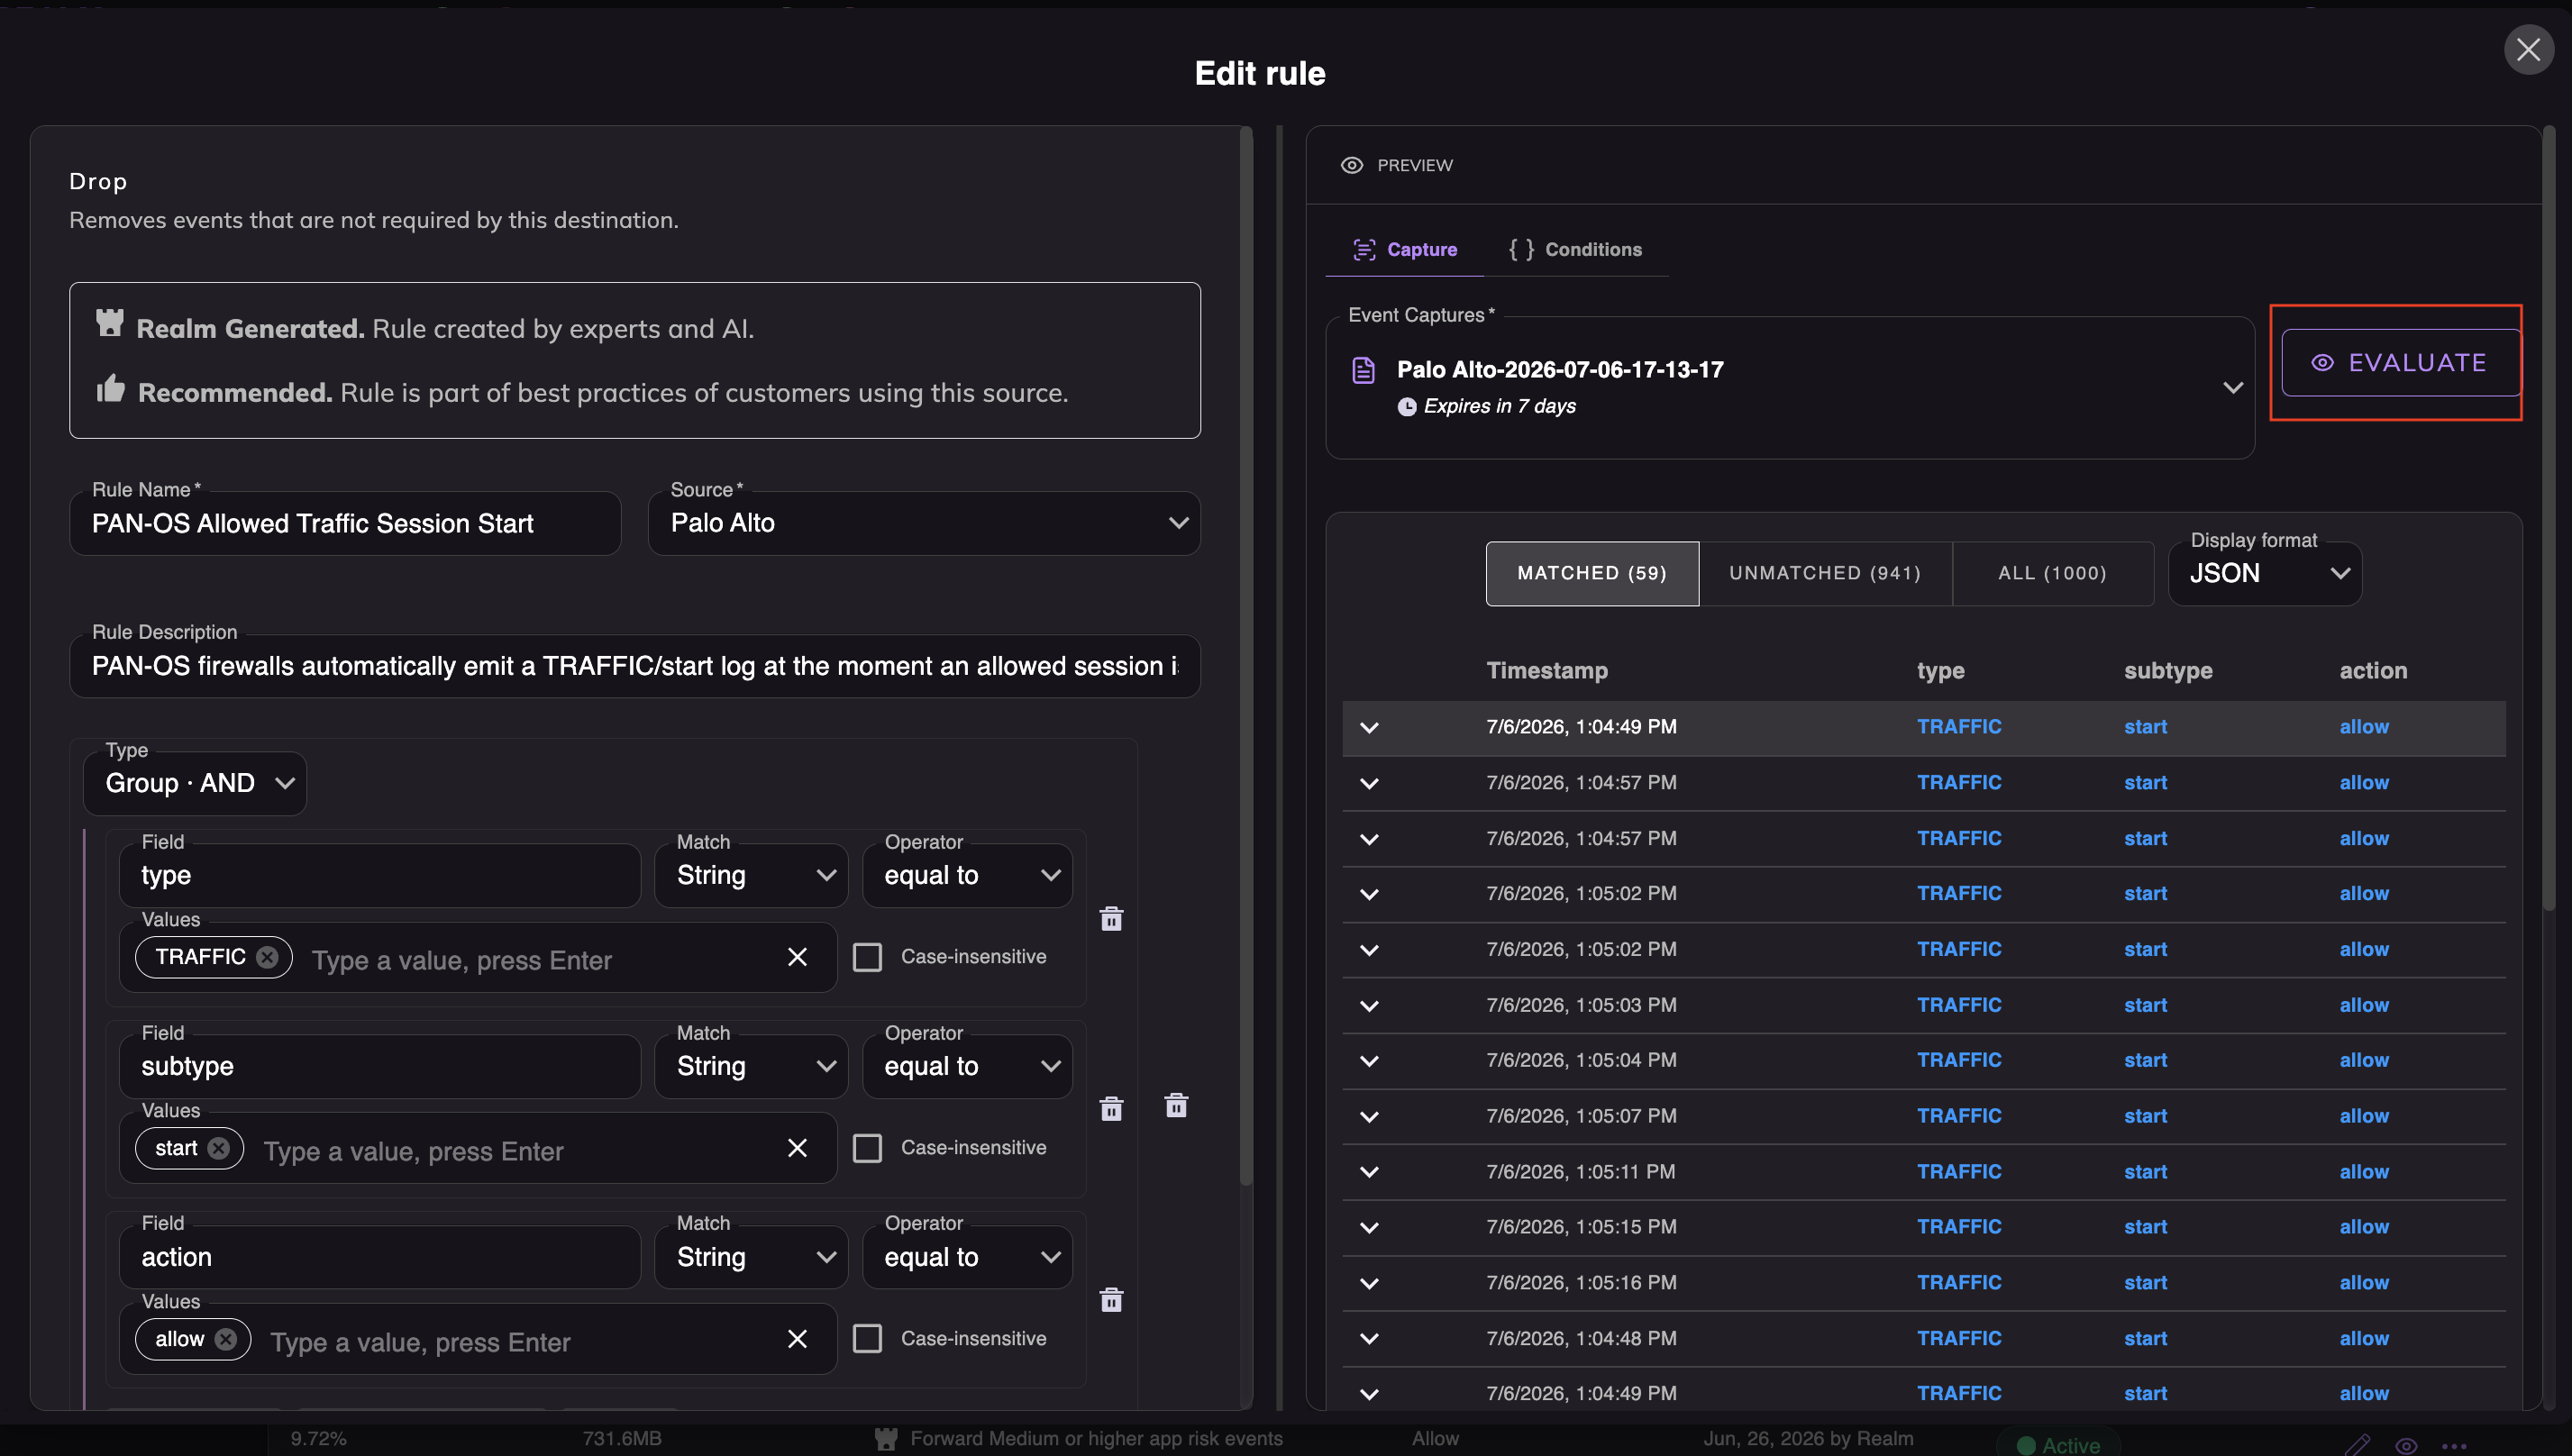
Before deploying a rule to your data flow , you can validate that your conditions match the intended events and do not capture unexpected telemetry.
Reviewing Rules:
- Capture Tab: Click the Evaluate button. The engine runs your draft rules against a 1,000-event log capture and displays the matched results, letting you see what types of events will matchor not match the rule.
- Conditions Tab: View the rule in a JSON viewer that will show up on the rule once saved.
Step 5: Save and Close
Once the evaluation demonstrates that your conditions are targeting the correct events:
- Verify that the correct rule action is configured at the top of your workspace.
- Review your logical groupings for any misplaced conditions.
- Click the green Save button in the bottom-right corner.
The editor will save your rule in a Pending state, and Realm will immediately begin evaluating incoming telemetry against your newly defined conditions of the rule in a monitoring mode until the rule is moved to Active.